Categories: Sharing experience, Microcontroller circuits
Number of views: 21089
Comments on the article: 0
How not to burn Arduino - tips for beginners
Microcontrollers are, first of all, devices for controlling, controlling and processing data, but not for working in power circuits. Although modern chips are quite developed in terms of the presence of various protections against accidental damage in the electrical part, nevertheless, there are dangers awaiting a beginner radio amateur at every step.
How to work safely with arduino? This is the main question of the article. Consider both electrical hazards for the microcontroller, and for the entire board and its components as a whole, as well as harmful factors of mechanical origin.
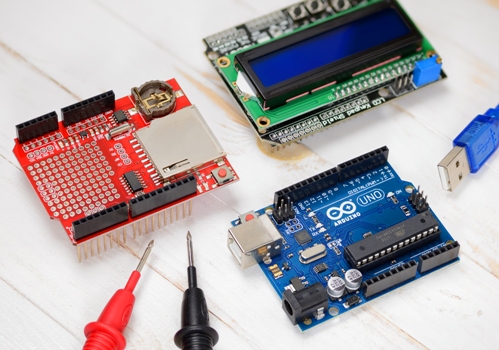
How to burn a microcontroller?
You can write a book about the internal structure of microcontrollers, so we will consider only the main points that you need to pay attention to when working. Microcontrollers are sensitive to both currents and voltages. Emergency operating modes are permissible only for a short time, or are unacceptable in general.
I will try to consider situations with real conditions and chips. Let's rely on the datasheet Atmega328. It is common microcontroller, found in almost all arduino boards, 168 were used in early versions, its main difference was half the memory size.
1. Supply voltage must be normal!
The microcontroller models that I know of are powered by constant voltage (DC), while the supply voltage can vary within the acceptable range. In the technical documentation for 328 atmega, the range of supply voltages from 1.8 to 5.5 Volts is indicated. At the same time, the speed of work depends on the voltage, but these are subtleties that affect the choice of the operating frequency and logical levels.
A zener diode is usually installed in the integrated circuits of integrated circuits to protect the input of short-term surges, but the zener diodes are not designed to suppress high-power bursts and prolonged operation in the wrong conditions.
Conclusion:
Do not exceed the power supply voltage of the microcontroller if you intend to run it from batteries or a source that you are not sure about stabilizing - it is better to install an additional linear or LDO stabilizer.
For the "death" of the microcontroller, sometimes even half a volt is enough. Additional electrolytic filter capacitor up to hundreds of microfarads, paired with ceramic in a couple of hundred nFs will only improve the reliability of the circuit.
Arduino:
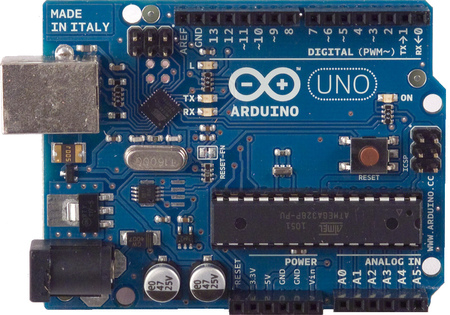
On the original as well as on most clones Nano, Uno linear stabilizers are installed, so you can supply power to either the designated pins or via a USB port. No more than 15 V.
IMPORTANT:
The pin with the name “5V” is intended only for connecting to a stabilized source of five volts, no more, this pin is directly connected to the Vcc leg of the microcontroller itself, while Vin - on the board goes through the linear stabilizer to the microcontroller.
And polarity too
The board does not provide protection against reverse voltage, so in case of an error you risk burning it. To avoid this, install the diode in series with the cathode power input to the board (pin Vin).
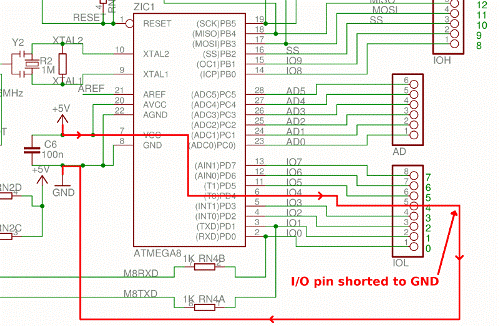
2. Do not short the pins
The manufacturer set the recommended current through the pin of the microcontroller, not more than 30 mA. With a supply voltage of 5 volts, this means that you need to connect an unfamiliar (new) load through a resistor of at least 200 ohms, which will set the maximum current to 25 mA. I think it doesn’t sound very clear. The words “Close” and “Overload” are different, but they describe the same process.
Short circuit Is a state when a load is installed between a terminal with a high potential and a terminal with a low potential, the resistance of which is close to 0.The real equivalent of such a load is a drop of solder, a piece of wire and other current-conducting materials connecting the positive to negative contact.
When the pin is set to a logical unit or "high", the voltage relative to the common wire on it is 5 V (3.3 or any other, the level of which is taken as a logical unit). If it is shorted to "ground", on the arduino board it can be designated as "gnd", the flowing current will tend to infinity.
Inside the microcontroller, internal transistors and load resistors are responsible for output levels 0 or 1, they simply burn out from a large current. Most likely, the chip will continue to function, but this pin is not.
Decision:
The output of Vin also cannot be shorted to gnd, although it does not belong to the microcontroller, but the board tracks may burn out and will have to be restored. For safety reasons, do not be lazy, and supply power through a fuse rated for a current of 0.5 A.
IMPORTANT:
The technical documentation for the 328th atmega clearly indicates that the TOTAL current through ALL pins should not exceed 200 mA.
3. Do not exceed logic levels!
Explanation:
If the level of 5 V is selected as the logical unit on the microcontroller, then the sensor, button or other microcontroller must send a signal with the same voltage.
If you apply a voltage above 5.5 volts, the pin will burn. Restrictive elements, such as zener diodes, are installed inside, but when they are triggered, the currents begin to grow in proportion to the applied voltage. Do not even try to supply a voltage alternating in sign, and even more so a network voltage of 220 V.
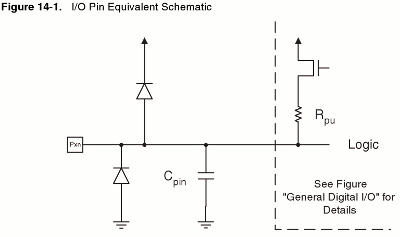
Here is the functional diagram of the output of the microcontroller. Elements (diodes and capacitance) are needed to protect against electrostatics, the so-called "ESD-protection", they are able to protect the chip from SHORT voltage surges, but not long.
Note: exceeding even half a second is considered long.
How to protect entrances?
Install parametric stabilizers on them. Schematically, this is a zener diode with a stabilization voltage of about 5 volts, it is placed between the output and the minus (gnd), and in series with it is a resistor. The pin is connected to the point between the resistance and the zener diode. At a voltage above 5 Volts, the latter opens and starts to pass current, excess voltage "remains" on the resistor, and at the input it will be fixed at the level of 5-5.1 V.

4. Do not load the stabilizer
If you decide to power the load from the 5V pin, you can burn a linear stabilizer, this bus powers the MICROCONTROLLER and is designed for it, however, it can withstand a couple of small servomotors.
Also, you cannot connect an external voltage source to this leg, the stabilizer does not have reverse voltage protection. To power additional actuators take voltage from an external power source.
Summary
Remember these four sections, and you will protect your Arduino from errors.
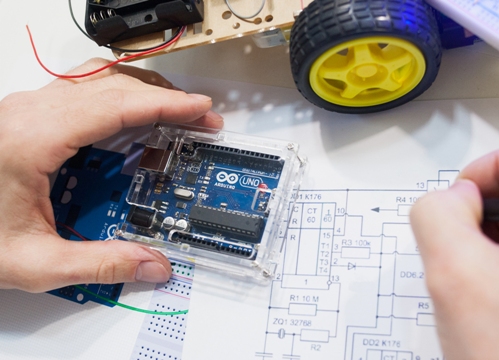
Safety precautions for microelectronics
In this section, we will talk about how to work correctly with the board, from the assembly phase to the operational phase of your smart system. Let's start with the installation work.
Is it possible to solder elements to an arduino board?
Of course yes, but not so simple. I think that you have a non-original board, and the Chinese copy, like mine, and thousands of other electronics lovers. This means that the manufacturing quality of such devices is quite different depending on the specific instance.
Soldering stations and adjustable thermostabilized soldering irons are becoming more and more part of everyday life and tools of home masters, but here it is not so simple.
I will give my example from life. I have been soldering for about 10 years, I started with the usual EPSN, and two years ago I got soldering station. But this did not become the key to quality work, I only became convinced that the basic requirement is experience and quality materials.
I bought solder in a spiral with a flux in a hardware store, not only that there was not rosin, but something that smelled like soldering acid, but it was not clear how it was soldered. He lay down in flakes, did not spread, had a gray color and did not shine after melt. The station settings were the same as always, but the adjustments did not give results.
I bought the board in an unassembled form, it was only necessary to solder the contact strips to their seats, as easy as shelling pears, I thought and “bit” the tracks.
The soldering iron tip was thick, there was enough heat capacity for soldering, but the solder did not want to spread, and the additional green flux paste did not help, as a result, the tracks left the board from overheating.
The board was new - I didn’t upload ten sketches to it. The microcontroller survived, but the tracks moved away and broke. The benefit, as well as the sense of the board, remains, soldering directly to the legs of the atmega on the arduino nano is inconvenient and not quick. As a result, I threw a couple of hundred rubles into the wind, and I could buy the proven POS-61 solder and everything would be fine.
Conclusions:
Solder with a normal soldering iron - this is a soldering iron that does not have the phase potential on the tip (checked indicator), and its power does not exceed 25-40 watts. Solder with normal solder and flux. Do not use acids (active flux) and do not overheat tracks.
Notes: if you are going to replace the microcontroller, firstly, if it is better to make it in the SMD case with a hairdryer, and secondly, do not solder it for too long (more than 10-15 seconds), let it cool, and when soldering with a hairdryer, you can put the heat sink in the middle cases in the form of a coin or a small radiator.
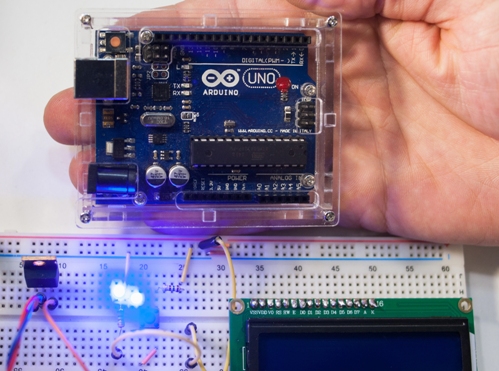
How to handle Arduino board?
Original models and many clones are made of materials of sufficient strength. The boards are covered with a protective layer, the tracks are even and lie confidently on the thick textolite.
The edges of the smallest elements are etched quite qualitatively. All this allows you to tolerate quite serious shocks and falls, minor bends and vibrations. However, cases of cold soldering and non-soldering occur.
Vibration and shock can lead to loss of contact, in which case you can walk with a soldering iron or heat the board with a hairdryer, be careful and do not blow off the SMD components.
The board refers to moisture, like any electrical equipment - negatively. If you plan to operate the device on the street - take care of buying sealed connectors and housings otherwise there may be disastrous consequences:
1. Incorrect reading of the signal from the analog sensors.
2. False positives;
3. Short circuits of the pins between each other and to the ground (see the beginning of the article).
The oxide formed from working in a humid environment can cause the same effects as the moisture itself, only the likelihood of contact loss, bending of elements and tracks is added.
conclusions
The line of Arduino boards is no different from any other electronics, it is also “afraid” of overloads, short circuits, water and shock. You will not meet special subtleties when working with it.
However, be careful when connecting new sensors and other additional elements, it is better to ring once again or check the purchase in another way. It happens that peripheral circuit boards may turn out to be short-circuited, because you never know what to expect from your Chinese counterparts.
See also at i.electricianexp.com
:

