Categories: Electrical Reviews, Microcontroller circuits
Number of views: 15980
Comments on the article: 0
Which Arduino board to choose
Among the entire variety of Arduino boards, it is difficult for a beginner to choose the right one. In addition to official boards, such as Arduino UNO, Nano, MEGA, there are also Arduino-compatible boards, such as Digispark, Electronic Troops, Seeeduino, Freeduino, Robocraft and others. What is their difference and which Arduino board to choose? Let's figure it out!
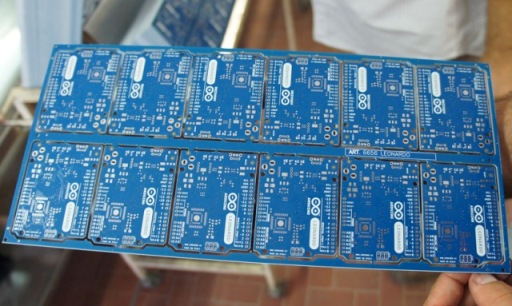
Shield Compatibility and Key Features
Perhaps this characteristic is on a par with such as: memory size, clock frequency and type of microcontroller used. Arduino clone boards can be divided similar to Arduino UNO, MEGA, and other baseboards. The most common is UNO; in fact, most clones are associated with it. Compatibility with shields is provided by arrangement of terminal blocks and PCB layout.
The size of the original UNO board is 6.9x5.3 cm, the dimensions of third-party boards may vary, but the location of the terminal blocks and the distance between the connectors should remain the same. In this case, the board will be compatible with standard shields of any origin.
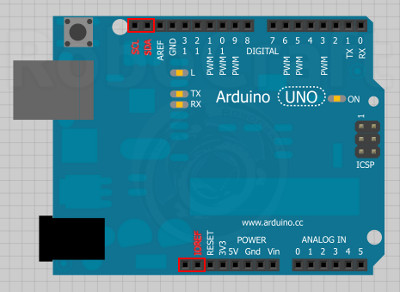
If we are talking in the context of "arduino", most likely, this version is what is meant. There may be no differences between the original and the clone, i.e. a full copy, and the difference may be only the color of the board cover and the firmware method. The USB-serial converter, on the same ONO, is made on the microcontroller, while on the original NANO - on the 232nd microcircuit, and on the Chinese - on the CH340, there are also ONOs with such converters, more about this later.
On the other hand, there may be differences in power supply schemes, and additional driver chips, protective circuits, decoupling circuits, port expanders on shift registers, etc., built into the board.
The concept of Arduino-compatible means that it compatible with Arduino IDE and the corresponding programming language, while it is not necessarily compatible with shields. An example of such a board is Lillypad.
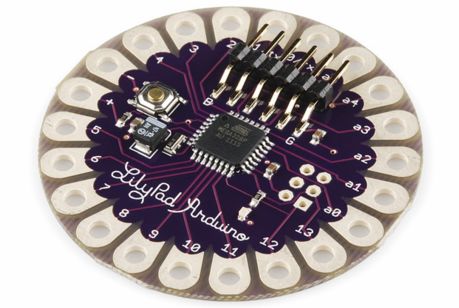
The board is compatible with the Arduino language, but not compatible with shields. If they need to be connected, then you need to connect manually to the corresponding pins. By the way, this board is focused on wearable devices, as an option for smart clothes. This board is made by SparkFun.
Board overview and tips for their use
A large number of modifications and third-party boards is not plagiarism or fake. This happened because Arduino has an open policy, which allows you to make modifications to the design and assemble kits, with free bundling intended for specialized areas:
-
Robotics
-
Automation;
-
For training, etc.
The names of the boards usually contain the Duino prefix, like craftduino or DCduino, and the model of the board can match the name, like the same DCduino UNO, if it is supplemented, then there will be another prefix or a completely different word describing additional functions. In addition to the above, it is worth paying attention to the supply voltage and logical levels, they can be 3.3 and 5 V.
For starters, you definitely need to take a common board - an Arduino UNO-like or Nano, the first costs about $ 5, the second is slightly cheaper - 3-5 dollars.
If you come across a model called Duemilanove, this is a complete analogue of UNO. The differences are only in the way of communication with the computer, I mentioned above that at UNO it is organized on an additional microcontroller - Atmega8u2, Duemilanove communicates with the computer via FT232RL.
Let's move on to the board review. In the photo below, these are full clones of arduino, below we will look at the upgraded boards.
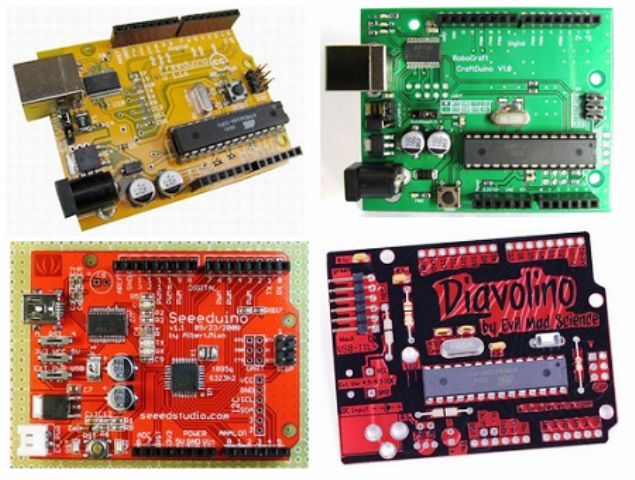
Iteaduino
An excellent UNO clone, the main difference is the presence of additional contacts of the "GVS" (ground-voltage-signal) connector. This is not exactly a connector, but rather the order of the wires in the connector. This is how many sensors and other peripherals are connected.
But in the standard comb, the contacts are located differently, while you will definitely not have enough power contacts (Vcc and Gnd), you will have to twist the wires, or use a solderless breadboard for connection.Iteaduino developers envisioned this and solved the problem by duplicating contacts like “dad” in the correct sequence.
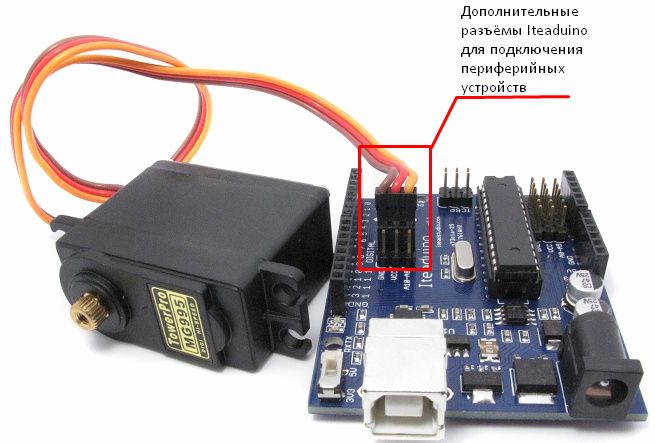
If you did not find such a board, you will have to buy a shield, but working with it is not so convenient, especially for a beginner, it is better when there are fewer parts.
Such boards can reduce the size and weight of the final product by reducing the number of shields.
Arduino Ethernet
Another unlike board with the ability to connect to the network via cable and install a micro SD card. Although there is an Ethernet-shield, but again - it will increase the volume occupied by the board in the case and the weight of the product. Pay compatible with shieldsbut it lacks a USB interface.
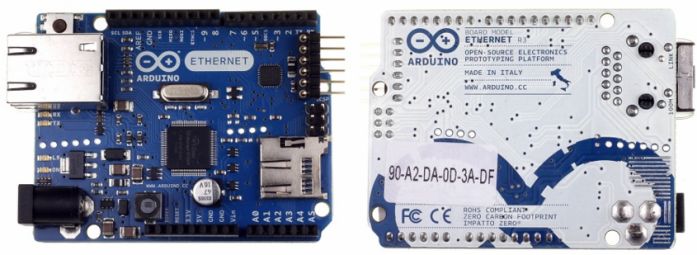
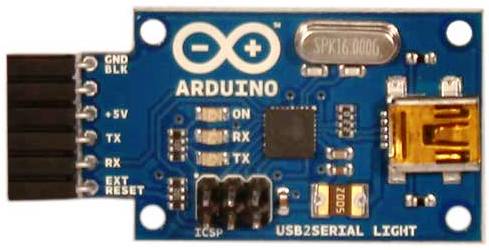
For firmware, you need to additionally purchase a USB-UART converter like this, for example, its comb fits the same on an Arduino Ethernet board.
Leonardo and Esplora
The Arduino model is for those who need a lot of analog inputs to read analog sensors, there are 12 of them, against 6 on the UNO board.
This happened due to the use of Atmega32u4, not Atmega328, as on most boards they are connected to pins, those on UNO were digital: 4, 6, 8, 9, 10, 12.
Such wiring allows you to use them as before, which gives compatibility with expansion cards or connect analog signal sources. The PWM outputs here are not 6, but 7.
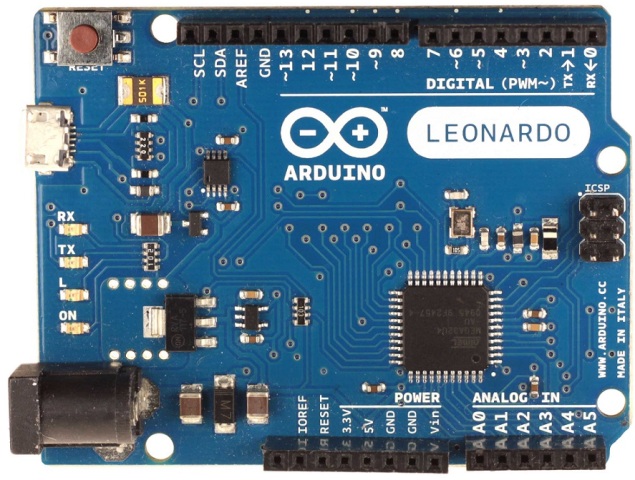
The need for a USB-UART converter has disappeared, Atmega32u4 has integrated USB hardware support. An optional PoE module may be required for operation. Such boards are great for creating controllers for a PC, it supports USB HID, and can act as a mouse or keyboard or gamepad, with the corresponding harness and details.
Leonardo is interesting in that, with the same size and compatibility with UNO, it has more functions in terms of working with PWM and analog signals.
Based on it, Esplora is made - essentially a joystick board compatible with the Arudin code and the ability to program and create a unique device. In the photo below you see such a board with an additional display (it is not included in the kit), it resembles a portable console.
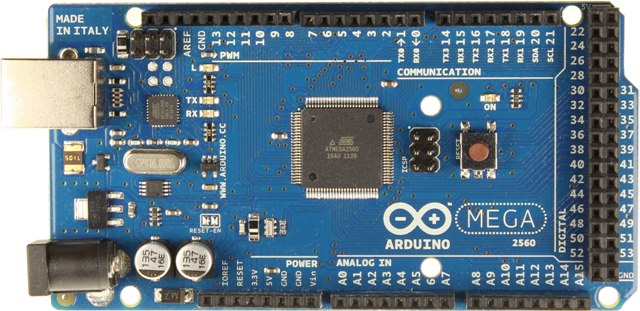
MEGA and DUE
If you are going to make an automation system for the whole house or another voluminous project, you will not have enough conclusions for connecting all sensors and actuators. The Atmega2560 controller will come to the rescue, and the Arduino board with the same name, there are 54 digital inputs and outputs and 16 analog ones. This is more than 2 times more than those that we examined above. The corresponding large shields are sold to her.
UNO shields are conditionally compatible. It is only necessary in libraries to correct the location of pins, because their numbering is different.
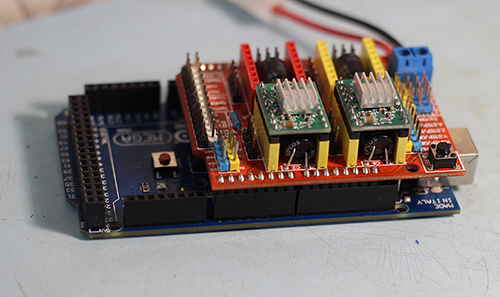
If you need even more features, you should change the architecture. Arduino DUE is built not on the AVR8 family MK, but on the ARM CORTEX-M3. This is a 32-bit controller. 54 digital and 12 analog channels will help to realize a large project. 4 UART interfaces, SPI, Twin-Wire, JTAG. 512 kb flash, 96 SRAM, 32 bits - all this is necessary for high speed execution of complex programs.
Let me remind you that atmegi 328 has only 32 KB of flash memory and 2 KB of SRAM
ATTENTION:
Power and logic level voltage - 3.3 V, if you want to kill DUE, apply 5 V to it.
The smallest arduins
For those who care about mobility, there are a number of official boards and one very entertaining arduino compatible. They are suitable for those who want to design a hidden device or wearable (portable). Let's take a closer look at them.
Nano
The current version is Arduino Nano v3.0. Of the smallest, it is most convenient, a Mini-b USB cable is used for firmware, but Chinese copies often use a micro-USB connector, which is very common for connecting a smartphone to a computer or charging it.
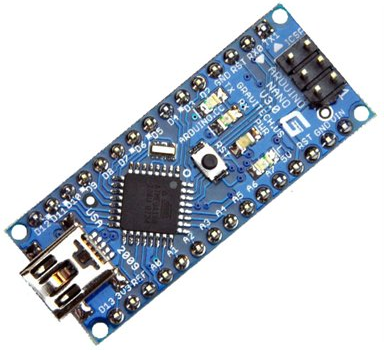
By the number and purpose of the pins, it is similar to UNO, but is not compatible with shields. By the way, for nano there are specialized shields (the Chinese are doing everything that you can imagine). Most often, Chinese copies use CH340G to communicate with a computer via USB, I personally did not automatically install the driver on Windows 8.1, the problem was solved after 2 minutes of searching in Google for the name of the chip, then everything went like clockwork.
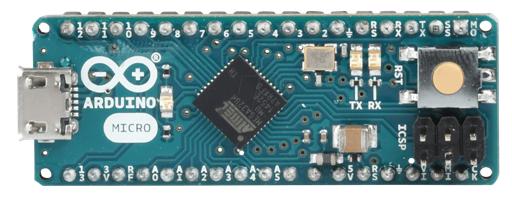
A little more than nano. Micro and nano are great for placement on a breadboard, almost always this makes circuit assembly and installation more convenient.Otherwise, everything is similar to the previous difference only in the layout of the board.
Arduino mini - not working via USB
The smallest board, similar in functionality to “unk” and “nanks” is a “mini”. It's funny that the smallest board, judging by the name, should be more than "nano". It turned out the opposite. Size savings were achieved by eliminating the communication node for usb (rs232, ch340g and the like) and the connector itself. To do this, there are contact pads for connecting via a serial interface.
The firmware is carried out using USB-serial (usb-uart) adapters. If you are going to engage in microcontrollers - it is worth buying it, where it can be useful a lot.
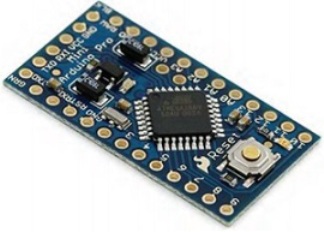
It can be supplied with soldered contact pads, or simply included in the kit, for self-installation.
The smallest Arduino at attiny
An interesting development of Digispark. Its form factor resembles a USB flash drive, it does not need a cable for its firmware, it is inserted into the computer’s USB port itself.
At your disposal are only 6 pins (3 PWM and 4 analog, I2C), 8 KB of flash memory for programs, 512 bytes ROM and RAM, 2 KB of memory, as usual, occupied by the bootloader, so that only 6 KB is available to you.
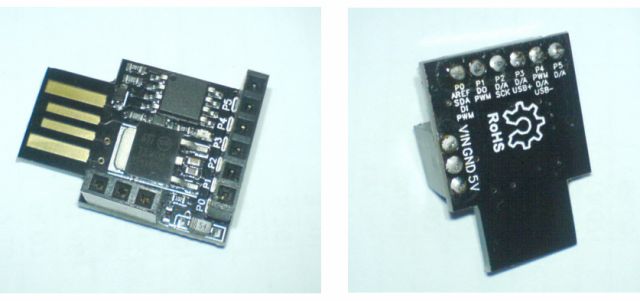
When flashing 2 digital pins (P3, P4) are used under USB, but you can use them after flashing, when disconnected from the computer. Pay attention to the pinout - it is written on the back of the board, in the picture on the right. To work with it, you need to configure an IDE.
A few more features:
1. pin P5 is “RESET”, if a logical zero is applied to it, the board will reboot, it is A0, i.e. the first analog input, the signal can be read in the ranges of more than 1.2 V, since everything below is perceived as “zero” and a reboot is in progress. A dubious pin in general, but if you think about how to use it and whether the measured signal reaches zero at all, then everything is not so bad.
2. Forget about monitoring the port, Serial is absent as such, so the board cannot be debugged from the computer. This can be avoided - if you devote more time to designing, well, or use external measuring devices - control lamps, multimeters, oscilloscopes.
Conclusion
I hope that this article helped you decide on the choice of board. I tried to consider the widest possible range of arduino in a small volume of text, it does not make sense to examine each board in detail, because they are almost the same, with the exception of various additions.
See also at bgv.electricianexp.com
:
