Categories: Novice electricians, Electric motors and their application
Number of views: 12696
Comments on the article: 0
How to disassemble an induction motor
Where only electric motors are not used today. Home appliances and cottage equipment, machine tools, power tools, electric vehicles and high-precision devices - everywhere you can find a small or large electric motor in one or another node of a device.
One of the readers may need to disassemble the engine for repair or maintenance, it is likely that this will need to be done at home. So let's see how the disassembly is done correctly.

In everyday life, you can find electric motors of two main types: asynchronous and collector (see - Household electric motors) Induction motors are more often used in ventilation equipment, in machines, in pumps. Etc. Collector can be found in drills, grinders and other power tools. Collector collectors are usually high-speed, while asynchronous ones have an approximately fixed synchronous speed of 750 rpm, up to a maximum of 3000 rpm.
Depending on the design of the engine and on your intentions, the procedure for disassembling the engine is also determined. However, first of all, safety precautions and accuracy must be kept in mind so that no small part is lost and no delicate part is broken, damaged. Next, we'll talk about how to disassemble an induction motor.
What is important to do and what you need to remember before starting the disassembly:
-
Remove the engine from the device where it was installed and turn off the power completely.
-
Take a hammer, screwdriver and wrench. Get ready to follow the sequence.
-
Arm yourself with a pencil to mark the places where some parts are joined to each other.
-
You do not need to knock hard with a hammer, even if it does not go, so as not to deform any part.

Disassembly Sequence:
1. First, remove the fan cover. It usually rests on three bolts that are unscrewed, usually with a slotted (flat) screwdriver. Please note that according to the shape of the removed cover, it immediately becomes clear what its proper location is, there is no need to put labels here.
2. Now remove the fan impeller. To do this, use a special puller or, in extreme cases, use a hammer and a chisel or only a hammer: remove gently tapping under the fins of the fan so as not to break it, it is quite fragile. After that, remove the pulley, if it has not been removed, and do not lose the key!
Now it is up to the end bearing shields or covers, in which there are bearings that hold the shaft in the correct position. Put marks on the engine casing and on the covers with a pencil, so that when assembling the parts are joined to the previous position. Then unscrew the cap bolts with a wrench.

The easiest way to pry each cover on all sides with a screwdriver, this is enough to remove them. But sometimes the covers may not easily come off, so get ready to apply light blows with a hammer through a piece of wood on the protrusions on the covers (or use a mallet) - not on the protrusions into which the bolts are inserted, but on the small special protrusions located between the ears for the bolts.
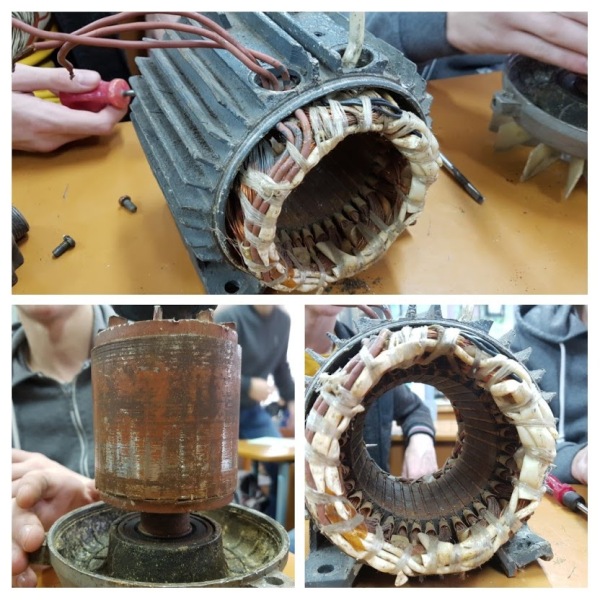
We start with the back shield, near which there was a fan. You can tap lightly under the cover with a hammer. It is important to prevent distortion, not to damage the rotor shaft! Between the covers and the winding, when the covers are unscrewed, it is better to put thick cardboard so that none of the covers accidentally damage the winding wires. Next, remove the rear shield - remove it from the bearing.
4.To check the bearing, remove the boot from it with a screwdriver, check for grease, if necessary, wash the bearing in kerosene and apply grease.
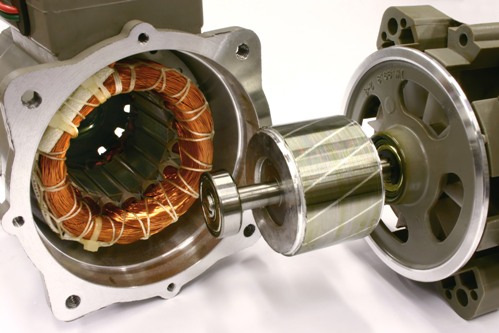
5. When the rear shield is removed, the rotor can be carefully pulled out together with the front shield. Here it becomes possible to check the front bearing similarly to the rear. Pull out the rotor very carefully, holding on both sides, so as not to damage the winding, try to move it strictly along the axis.
6. Now you can remove the plug from the terminal box located on top of the motor housing. After that, it remains to unscrew the bolts on the cover, remove the cover. Stator winding leads are placed under it. You can check the conclusions, clean, ring with a multimeter, measure the resistance of the windings, switch from star to triangle, or from triangle to star, as well as connect the necessary (new or additional) terminals to the terminals.
7. Extremes. If you need to pull out the stator, then keep in mind that it is securely pressed in. You have to cut the case or resort to using a hydraulic tool. As for the winding, to remove it, the varnish is first annealed, then the wires are pulled out using pliers. But these are extremes that are usually not reached.
See also at i.electricianexp.com
:
