Categories: Electrical Reviews, Microcontroller circuits
Number of views: 46774
Comments on the article: 0
What are Nextion displays and how to work with them?
For the implementation of any projects, whether it is a smart home, industrial automation, a device for outputting computer systems, or a simple clock, you will need an output device. A simple option is seven-segment LED indicators. But such an implementation would be inconvenient to use.
We have already published article on displays for arduino and other microcontrollers, but they also have a drawback - they are suitable for text data or minimal graphics. To make the system modern and convenient, you need to use full-fledged LCD displays. In this article, we will talk about Nextion displays, what it is, how, and why they can be used.
What is Nextion
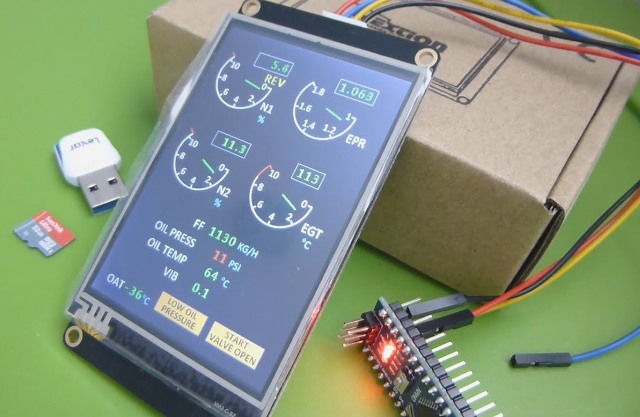
The manufacturer positions the Nextion touch displays as HMI - Human-machine interface, which in Russian sounds like a "Human-machine interface." This is the name of any device with the help of which human-machine interactions take place: parameter monitoring, control of actuators, data entry, etc.
In practice, this is not just a display, but a device with a 32-bit ARM microcontroller on board, which “can” not only display data, but also everything that the microcontroller should “be able to”. The presence of a powerful microcontroller involves the use of some port to connect to it - on the boards of the Enchanced series there is a GPIO with 8 pins, with half of them (from 4 to 7) support PWM.
There is an API for creating Nextion software (although ITEAD calls it an IDE, there isn’t much difference in the first approximation). In simple terms, you get a pun, but it’s true: for these displays there is a program for creating programs without programming knowledge.
Devices can be paired with popular development platforms Arduino, Raspberry Pi, Raspberry Pi A +, B +, as well as Raspberry Pi 2/3, support for Rpi Zero has not been announced, but most likely it is possible to organize interaction through a serial interface.
They are designed and manufactured by ITEAD, it is known for another product - SonOff Wi-Fi Relays for Smart Home, which is in demand and success both among the layman, and among enthusiasts.
ITEAD studio is located in Shenzhen in China. According to information from the official website, the ideology of the company consists in giving people the means to develop and construct in order to “make innovation easier”.
In the following video, the author clearly explained the advantage of Nextion over shields with displays for Arduino:
What are the models and their specifications
The range of Nextion displays is divided into two groups:
-
Basic - basic and simple models;
-
Enhanced are advanced models with some additions.
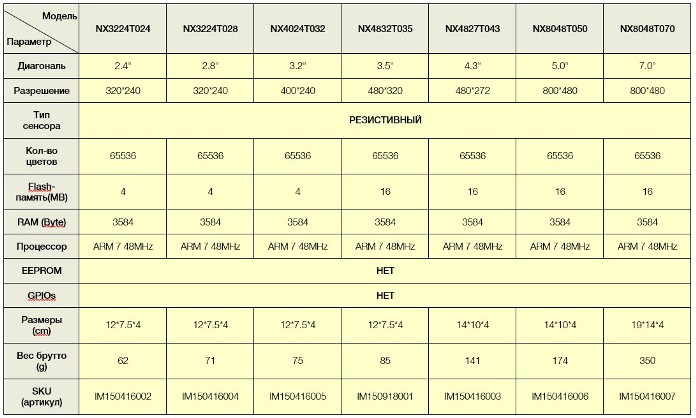
The table below summarizes the current BASIC models.
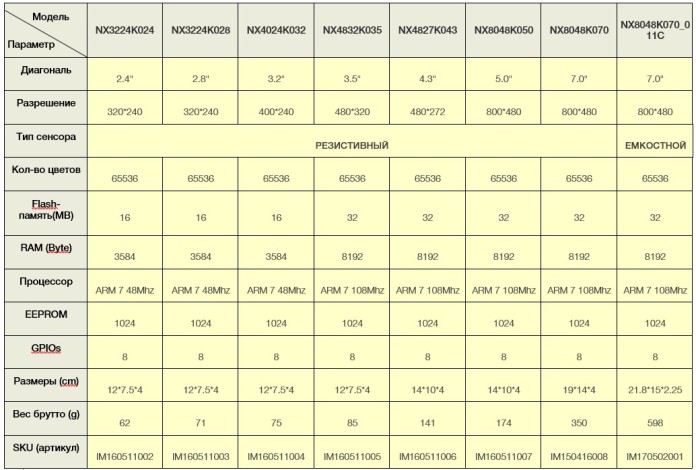
The table below summarizes the current ENHANCED models.
As you can see, all models have a display with 65k colors, on board there is a core with ARM 7 architecture, with FLASH, RAM-memory.
The main differences between Basic and Enhanced are that the latter have on board:
-
RTC - Real-Time clock (real-time clock chip);
-
EEPROM - non-volatile memory;
-
The lineup has 1 display with a capacitive sensor;
-
A large amount of FLASH, and RAM memory;
-
There are 8 GPIO pins;
-
Microcontroller with a higher operating frequency.
The differences are reflected in the official English video:
Device
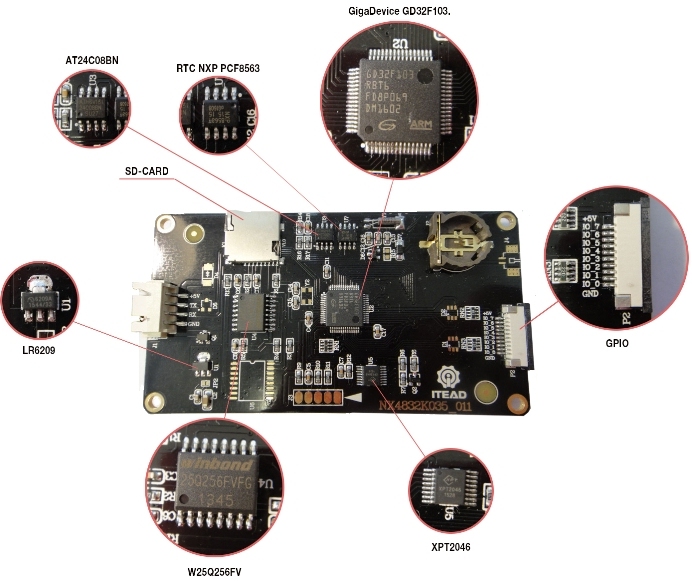
Considering the device of each model is pointless, there are "datasheets" for this, but for clarity, we will analyze the Nextion filling using the example of the Enhanced model NX4832K035.
Let's analyze the elements of the board:
-
GD32F103 is the heart of the board, the ARM CORTEX-M3 microcontroller is an analogue with the same SMT32 marking, namely ST32F103.
-
PCF8563 is a real-time clock chip from NXP. In the upper right corner you see the CR1220 battery slot, from which they are powered in the absence of an external source.
-
AT24C08BN is a 1024 kb electrically erasable non-volatile EEPROM memory chip. The last two positions "communicate" with the microcontroller via I2C.
-
LR6209 is a linear controller with low drop (LDO), its parameters are 3.3V and 250mA, pulse converters can be used in other display models.
-
W25Q256FV - 32 MB flash memory from Winbond.
-
XPT2046 - touch screen controller.
-
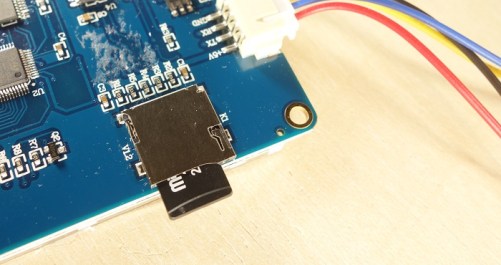
The SD card slot is needed for firmware (upload files with * .TFT extension to the root of the card). The card must be formatted in fat32, be no more than 32 Gb in size. There should be only 1 file with firmware on the card.
-
GPIO connector for a loop with a step of 1 mm, combs 2.54 mm.
An expansion card is connected to the GPIO connector using a cable (supplied, but specify when ordering, in case the package is changed). The expansion board has buttons, a piezo emitter (the so-called buzzer) and an LED.
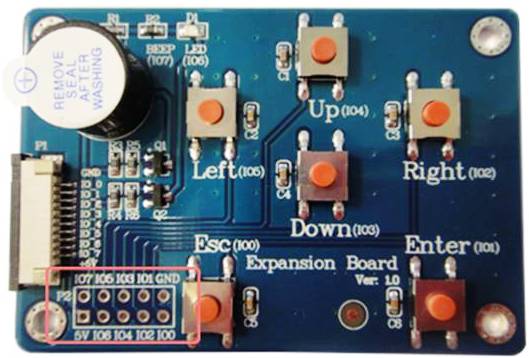
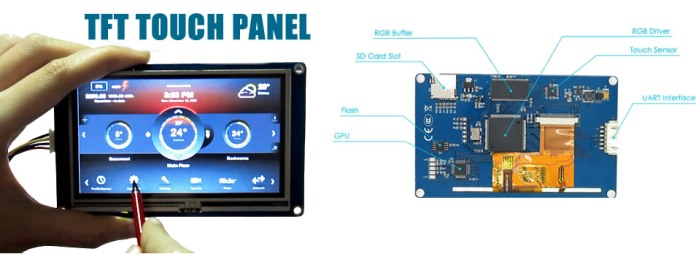
To communicate with the environment, BASIC models use a serial port, while models with GPIO can communicate directly through it. Which makes it possible to use the device independently, without additional modules. The figure below shows the designation of display elements without a GPIO, in fact, everything is similar.
Schemes, connection, communication
To connect power to the Nextion display, there is a special adapter for micro USB.
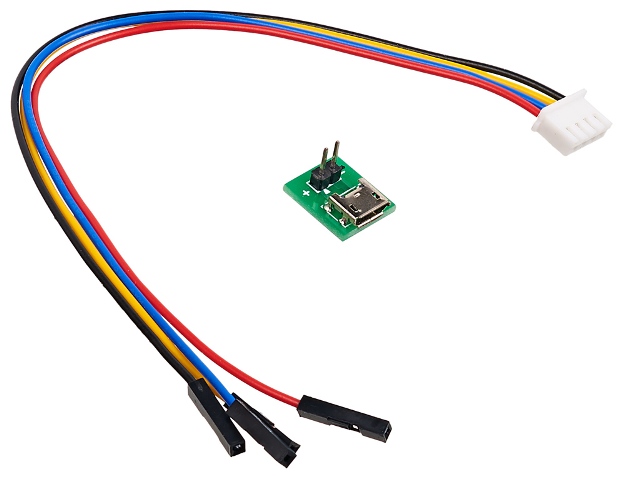
With it, you can supply power to the module, for example, to run the demo mode or connect from a separate power source, independent of the device connected via the serial port.

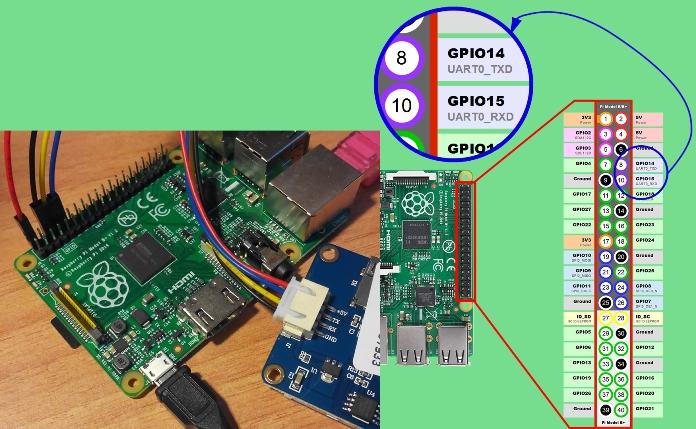
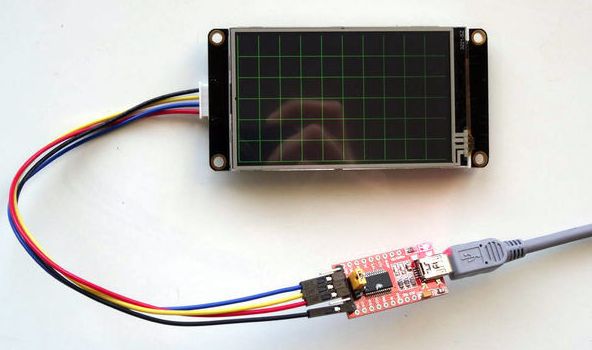
There are four pin connectors on the display board, and 4 wires come out from the plug to connect to it:
-
Red - "+" power;
-
Blue - TX (Serial Interface Output);
-
Yellow - RX (Serial Interface Input);
-
Black - GND aka “-” power.
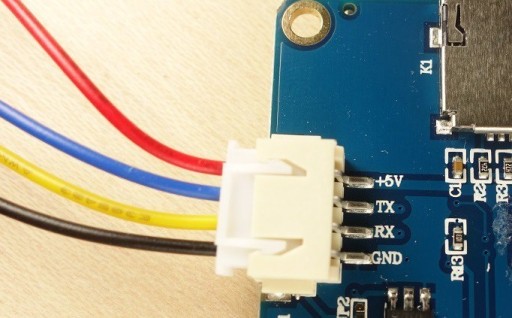
The serial port connects to a computer, microcontrollers and other things, as usual - rx to tx, and tx to rx. Below is an example of a display connection diagram to Raspberry Pi through the serial port.
Connecting to Arduino is no different.
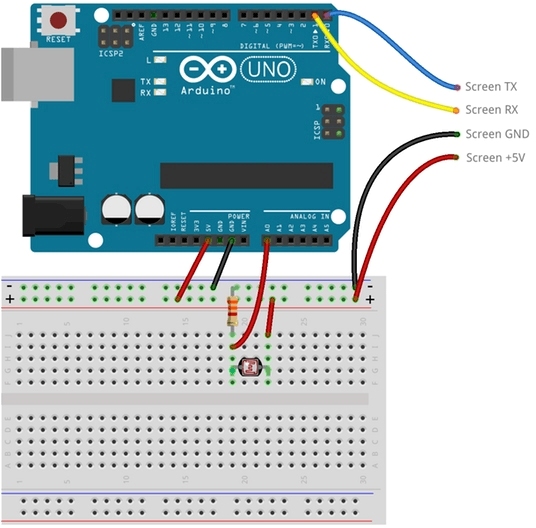
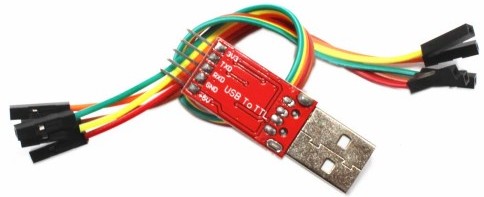
To communicate with a computer or display firmware, you can use a USB-UART adapter, such as the one shown below. Note that you can also use ARDUINO boards not for their intended purpose, but as a USB-UART converter, for connecting various devices to a computer and their firmware.
Nextion editor
As already mentioned, there is special software for working with displays - Nextion Editor. You can download it from the official site.
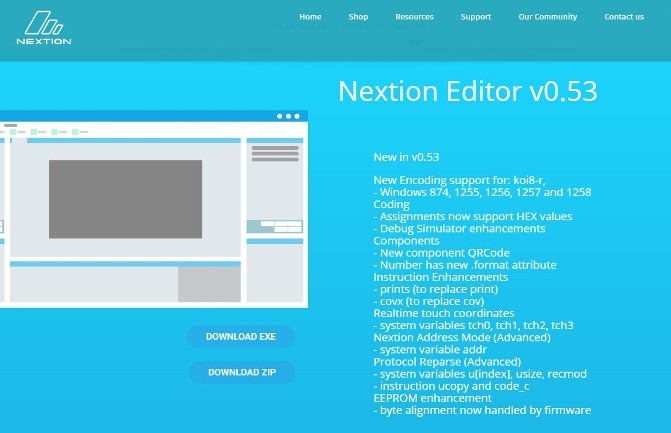
After installation and inclusion, you will see the following:
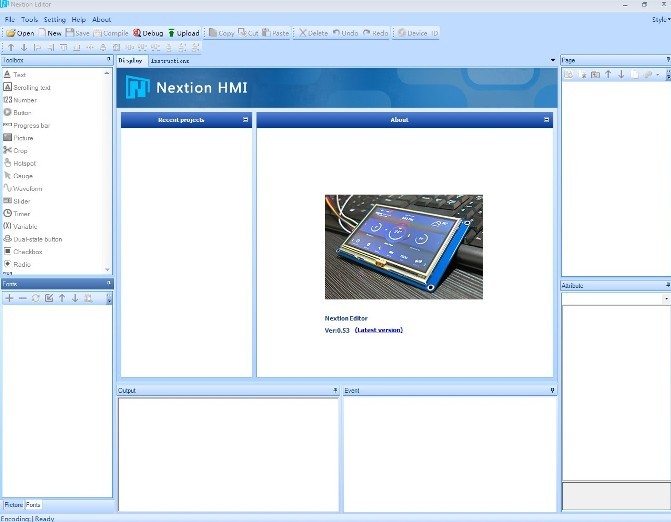
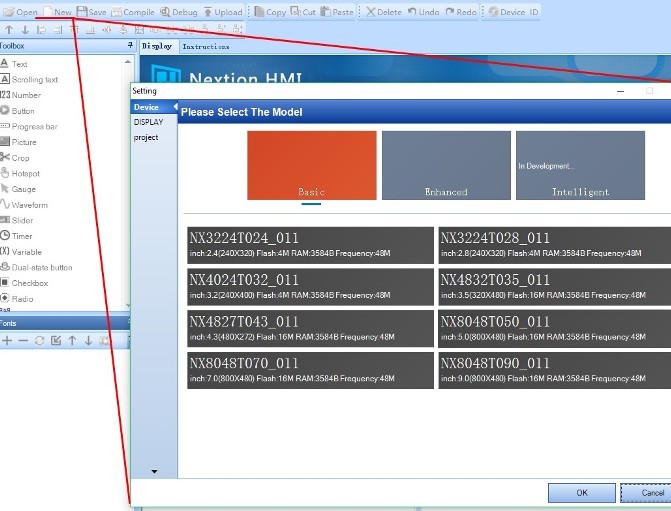
To start working, you need to click the “new” button, indicate where to save the new document and select a display model.
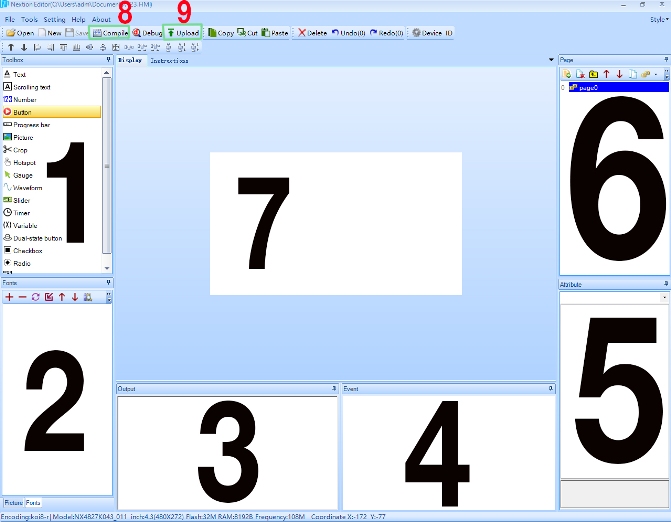
In the figure, the numbers indicate:
1. Tool area (text, numbers, buttons, input fields, sliders, etc.).
2. The area where the downloaded fonts and pictures are displayed.
3. The window for outputting compilation results.
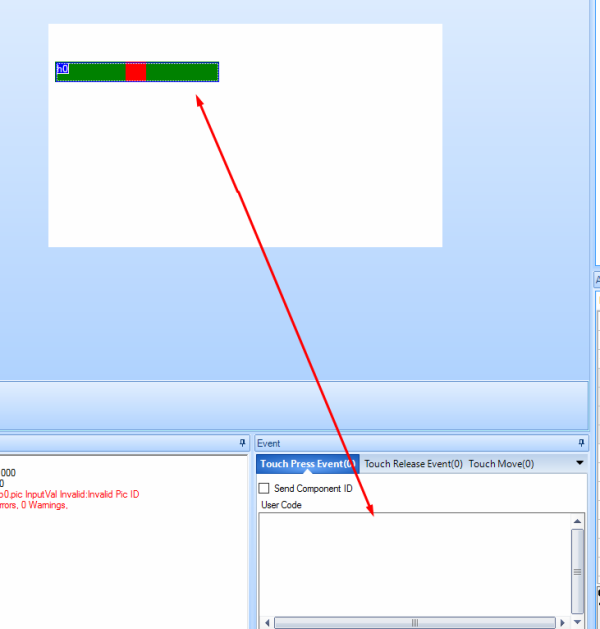
4. Window for displaying the code of elements and events (shown in the figure below on the example of a slider).
5. Display of the attributes of the elements.
6. List of pages (a page is a group of items that appear on the display.)
7. Screen display area.
8. Starting compilation of code.
9. Download to UART display
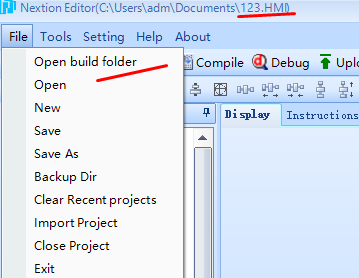
To find a file for firmware using a micro SD card, you need to click File-open build folder, a folder with them will open. Pay attention to the address. The .TFT file will be named in the same way as the HMI project file.

The program has the ability to simulate to verify the operation of the project, with support for connecting an external controller with which it will work. That is, to design and interface with external controllers, you don’t even need to buy a display - you can try for free whether this device is suitable for your tasks.
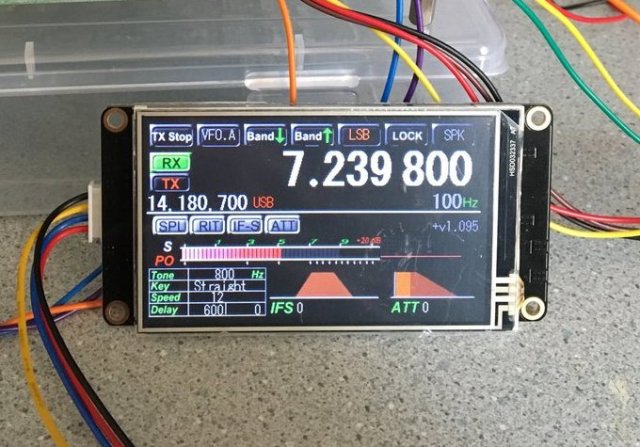
Examples of using
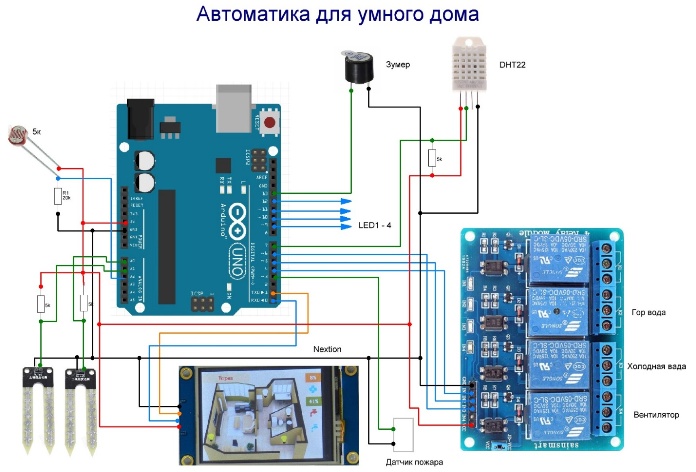
Consider a small selection of projects in which this display is useful! An excellent example of use will be automation for a smart home with temperature, humidity, leakage sensors and executive relays. Here the Nextion display works with Arduino.
Simple clock with alarm:
A project of a weather station that works over Wi-fi using ESP32:
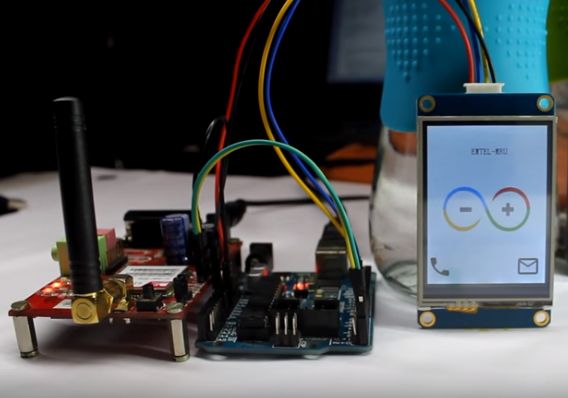
Mobile phone from display and Arduino:
Simple to Complex NEXTION Display Training
A total of 76 lessons with a total duration of 25 hours. The course covers a very wide range of issues: connecting the display, flashing, creating projects, setting up operating modes, graphical design of projects and managing external devices directly from the display or using an auxiliary microcontroller.
Particular emphasis in the course is made on the study of operating modes, commands for recording scripts and creating graphic design of projects. The advantage of the course is a very detailed analysis of all the features of Nextion displays. The course will be especially interesting to fans of Arduino.
Conclusion
As you can see, Nextion displays are not just an output device, but a complete functional device. When interfacing with any microcontroller using the serial port, it is possible to implement projects of both amateur and completely industrial applications. A fly in the ointment is their relatively high cost - the cheapest version of the BASIC line costs $ 16.4, and the most expensive ENHANCED $ 88-108. Although, depending on what to compare, after all, operator panels from manufacturers of industrial equipment are an order of magnitude and somewhat more expensive.
See also at i.electricianexp.com
:

