Categories: Featured Articles » Electrician Secrets
Number of views: 69377
Comments on the article: 1
Installation of LED strip on the ceiling
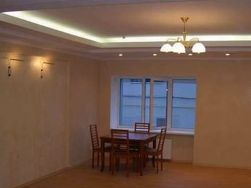
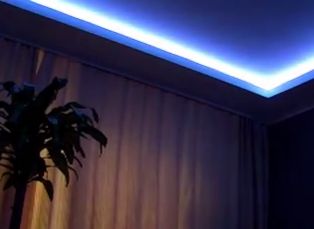
 When planning an overhaul of an apartment, the question arises of choosing lighting equipment. I would like to introduce some kind of innovation, a twist. There is a great alternative to traditional lamps - LED Strip Light. Installing LED strip on the ceiling will radically change the overall appearance of the whole room. At the same time, great opportunities open up for you in choosing the best design solution. You can choose either a single color tape or a three-color one, that is, an RGB type tape.
Among the advantages of using LED strips can also be noted the ability to adjust the brightness of the lighting, as well as the speed of color change. You can choose the lighting for any mood and your surroundings. In addition, for the installation of LED strip, you do not need to call specialists, since it can be easily mounted and connected independently. In this article, we will talk about how to install an LED strip on the ceiling.
First of all, we note several features of the choice of LED strip. A tape is selected according to several criteria:
- brightness of the LED strip;
- type of LED strip (single or tri-color);
- the number of LEDs per meter of LED strip;
- degree of protection against the effects of the negative effects of moisture and foreign objects (IP).
Before purchasing an LED strip, you must decide on the required lighting brightness, the required long strip, the humidity level of the room where it is planned to be installed. The more LEDs per meter, the higher the brightness of the tape. Accordingly, you should choose the optimal number of LEDs depending on the required level of illumination and the total length of the mounted tape.
More details on how to choose the right LED strip are described here: How to choose a quality LED strip for the ceiling
The LED strip is mounted on the ceiling in several ways. One of them is the installation of the tape on the ceiling baseboard. This method has a huge advantage in that you do not need to alter the ceiling (installation of a cornice from drywall).
The ceiling plinth is mounted at some distance from the ceiling. As a rule, this distance is 8-10 cm.
When the baseboard is mounted, you can start gluing the LED strip. LED tape is glued very simply, like ordinary adhesive tape. Remove the bottom layer of the tape and glue it to the desired location, in this case, on the ceiling plinth. Do not forget that before gluing the tape you should clean the surface of the ceiling plinth from dust, moisture and bumps. Otherwise, the mounted tape will unfasten after a while.
The next way is to install the LED strip in the cornice, which is made of drywall. This installation method is much more complicated, but the ceiling will look prettier.

How to mount a ledge for LED strip? The principle of installation of the cornice is similar to the installation of a plasterboard ceiling, only in this case we will not sheathe the entire ceiling, but only around the perimeter.
First of all, you need to prepare the cornice frame. To do this, it is necessary to fix the metal profile to the wall. The distance from the ceiling to the edge of the profile is the height of the future cornice. Next, determine the width of the future cornice, then mount the profile ten centimeters closer to the wall. For example, if you chose a cornice width of 30 cm, then mount the profile at a distance of 20 centimeters from the wall.
Then it is necessary to lower down the small pieces of the profile from the last mounted profile, the size of which is determined by the height of the future cornice.If you mounted the profile on the wall at a distance of 15 cm from the ceiling, then you need to choose the same length of profile pieces that will be attached to the profile located on the ceiling.
Next, proceed to the connection of the resulting design. In this case, we connect the profile on the wall with the mounted sections of the profile, lowered from the ceiling.
In addition, it is necessary to provide for the possibility of attaching a small side along the perimeter of the cornice.
To power the LED strip, you need Power Supply. Depending on the power of the connected LED strips, one or several power supplies can be used. Provide special niches in which you can place the power supply, controller and amplifier (if using RGB tape).
The standard size of one LED strip is 5 m, if you need a longer length, you can connect another LED strip or part of it. How to connect one or more LED strips is described in separate article.
When you have decided on the installation of the power supply and other auxiliary elements (if necessary), conduct the necessary conductors to the place of connection of the LED strip.
Next, you can proceed to the plating of the cornice with drywall. At the same time, it is also necessary to lay drywall on a hidden shelf, since the LED strip will be glued to it. Perform the necessary finishing work and prepare the surface of the hidden shelf for gluing the LED strip. It remains only to glue the LED strip and connect it to the previously failed conductors.
See also at bgv.electricianexp.com
:
