Categories: Featured Articles » Practical Electronics
Number of views: 151586
Comments on the article: 9
How to measure voltage, current, resistance with a multimeter, check diodes and transistors
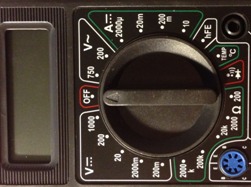 The DT83X multimeter has only two limits for measuring alternating voltages 750 and 200, of course, this is in volts, although only numbers are written on the devices. Thus, if there is a need to measure the voltage in the outlet, then you need to select the limit of 750, in other cases 200. Here you should pay attention to this subtlety: the alternating voltage should be sinusoidal with a frequency of 50 ... 60 Hz, only in this case the measurement accuracy will be acceptable.
If the measured voltage has a rectangular or triangular shape, and its frequency is much higher than 50 Hz, at least 1000 ... 10000 Hz, then the readings on the display, of course, will appear, but what they symbolize is unknown. Here we can only say with confidence that there is an alternating voltage, the circuit seems to be working.
Symbols on the front panel of the multimeter
But, let's take a break from the measurement process and take a close look at the front panel of the multimeter. Here, in addition to numbers, you can see many different characters reminiscent of Drudles (pictures are scribbles, for which you need to come up with an explanation, a signature). Figure 1 shows all the Drudles that can be seen on multimeters, and their clues are the explanations.

Figure 1. Designations on the front panel of the multimeter
These designations should be memorized as a multiplication table, and never be forgotten, because they will not only help to use the multimeter correctly, get the correct measurement results, but also save the device from failure if used improperly.
A few words about connecting the multimeter to the measured circuit
All multimeters are equipped with measuring probes, and, for all models of devices, they are the same: at one end there is a single-pole plug for connecting to a multimeter, at the other a measuring probe is not very, however, of a convenient design. Probes are usually red and black, which allows you to observe the polarity of the connection. This is best done as shown in Figure 2.
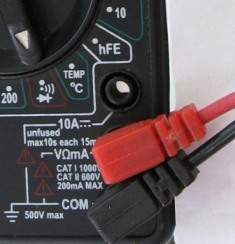
Figure 2. Connecting test probes to a multimeter
But, if you look, the observance of polarity is not particularly necessary. When measuring AC voltage, the polarity of connecting the device does not play a role at all, the result will be the same. When measuring DC voltages, if the polarity is reversed, a “-” sign will simply appear in front of the voltage or current value, but the voltage value will be correct.
Nevertheless, it is better to connect the test probes as shown in Figure 2: the black probe in the socket labeled “COM” (common), and the red one in the socket located above, which will allow all measurements except current measurements at the limit of 10A, which You don’t have to do it too often.
Especially it is necessary to observe the polarity of connecting the probes in the “ringing” mode of semiconductors: the positive probe of the ohmmeter will be present on the red probe, which will allow you to correctly connect the test piece. More details about testing semiconductors will be discussed below. Connecting the probes for checking the diode is shown in Figure 3.
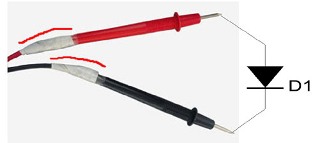
Figure 3. On the red probe “plus” of the ohmmeter
The wires in the test probes are fastened only by soldering, and at the exit from the plastic lugs they freely hang and wound, and eventually unwind completely and fly out. To prevent this from happening, you should strengthen the wires in the probes with shrink tube or electrical tape.
Little remark
It is easy to see that in ohmmeter mode, positive voltage is present on the red probe, as well as when measuring direct voltage. If you have to use a pointer tester, you should remember that in this case, the plus of the ohmmeter will be on the probe, which is the "minus" in the mode of measuring constant voltage. But back to the modern multimeter.
Current measurement
To measure "high" currents, you will have to switch the red probe to the socket labeled 10A. Near this nest you can see a warning inscription stating that this limit is not protected by a fuse, and measurements can be made in just 10 seconds, and then take a break for 15 minutes. Why?
To correctly answer this question, we are not too lazy to open the device, what you have to do, just to replace the battery. Figure 4 shows a fragment of a multimeter board.
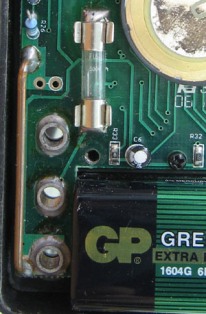
Figure 4. Multimeter input jacks
The figure shows a small fragment of the multimeter circuit board, namely three input jacks. The upper one is just for measuring 10A current, the lower one is a common, middle socket for all other measurements. The thick wire bracket on the left, this is precisely the measuring shunt of the 10A limit. The diameter of the wire is at least 1.5 mm, which allows us to hope that it can withstand a current of 10 or more amperes for a long time, and not 10 seconds, which is warned on the device’s body. Then another why?
The fact is that the standard measuring probes inside themselves contain a very thin wire, and this is what the warning sign refers to. The author of the article happened to be an eyewitness, but not a performer, like a multimeter included in the ten-amp range, they plugged it into a socket! There was an average explosion, the device was already mourned, and almost buried.
But after a detailed check, it turned out that only the probes were flapping, and the device itself was safe and sound: the tiny wires inside the measuring probes worked like a fuse. Therefore, if long-term monitoring of currents within 5 ... 10A is required, it is quite simple to replace the standard probes with more "strong" ones.
Multimeters of the budget series DT83X can only measure direct currents, they simply do not have a mode for measuring alternating currents. Yes, somehow it is not always needed, although the more expensive AC models, of course, measure it. The largest current measurement limit is no less than 20A! And these devices are equipped with the same measuring probes.
Figure 4 shows a fuse that protects the multimeter within the current measurement range of 2000µ, 20m, 200m. So do not be surprised if, at these limits, the multimeter does not want to measure current, but immediately remove the back cover and watch the fuse.
In the upper right corner of the picture is a quarter of some bright circle. This is part of the piezo emitter, the one that squeaks in the sound mode. It is from this “call” that they say that it is necessary to “ring” the circuit.
What does it mean to ring
Those who used arrow testers know that before proceeding with the measurement of resistances, you must set the arrow to zero on the scale. To do this, simply connect the test probes to each other and twist the corresponding knob.
Although digital multimeters do not need to set zero, you still have to connect the probes: this is another good rule for using the device. Thus, the integrity of the probes is checked first of all (standard probes break off very often), and at the same time, the zero of the scale. If the multimeter is in “ringing” mode (as shown in Figure 5), an audible signal sounds.
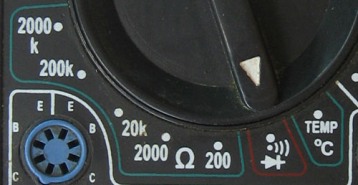
Figure 5. Multimeter in the “dialing” mode
An audible signal is heard only if the resistance between the test probes does not exceed 47 ... 50Ω. This property is used when checking the integrity of conductors and tracks on printed circuit boards. With the wire tapping mode, the semiconductor test mode is combined.
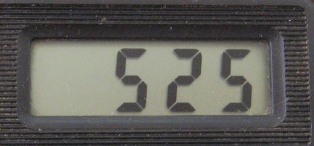
If the input probes are not closed, or in the circuit under study, an open circuit, or the diode under test is turned on in reverse polarity, 1 is displayed on the multimeter display, as shown in Figure 6.
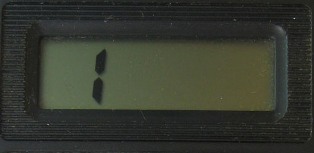
Figure 6. Multimeter shows a break
The same can be seen on the display, if you try to measure the resistance of 200KΩ at a limit of 200Ω. In other words, the measured resistance is higher than the measurement limit, the device “thinks” that the circuit is broken.
The same picture will be, if the voltage of 24V is measured in the range of 20, the device is off-scale. Just don’t need to supply a voltage of 100 ... 200 to the range 20, since the device may not withstand such bullying and simply burns.
Resistance measurement
Until we have gone far from Figure 5, we will consider how to measure the resistance of resistors or high-resistance conductors. To switch to the resistance measurement mode, just turn the mode switch clockwise, where there are several limits.
-
200Ω
-
2000Ω
-
20k
-
200k
-
2000k
The first two limits contain the symbol Ω, which means that the numbers on the display will show the resistance value in ohms. At a limit of 200Ω, you can measure the resistance of resistors up to 200Ω, the limit of 2000Ω is designed to measure resistances up to 2KΩ.
If the measured resistor is marked 1K5, the device will show 1350 ... 1650 Ω, the tolerance of the resistor is ± 10%. This must be remembered when measuring resistances.
The remaining three limits contain the letter k (although it should be K), and the measurement result will be obtained in kilograms. The limit of 2000k allows you to measure resistance up to 2MΩ, the measurement result is shown in kilo-ohms.
When measuring a resistor with a nominal value of 1MΩ, the result can be seen on the display 995 ... 1000, again, the tolerance affects. A 560K resistor will show 560.
If the resistor 5K6 is measured at this limit, then there will be only 5 on the indicator - the fractional part of the number is simply discarded. In this case, more accurate results can be achieved if measurements are taken at the limit of 20K: 5.61 is indicated on the display. Therefore, you should always choose a limit that provides a more accurate result.
If, when measuring currents and voltages, it is recommended that you start from the maximum limit for fear of burning the device, then when measuring resistances, you should do exactly the opposite, starting with the lowest possible limit. Why? Everything is quite simple.
Suppose that the resistance measurement limit is 200Ω, and the resistance of the measured resistor (we assume that it is unknown to us) is 51K. It is obvious that the limits of 200Ω, 2000Ω, 20k are not enough to measure such resistance, and the unit will appear on the display (Fig. 6). And only when there is a switch to the limit of 200k, you get a reliable result. Further switching of limits is no longer required.
Testing Diodes and Transistors
It is carried out in the “dialing” mode, as shown in Figure 5. For an example, Figure 7 shows the connection of a low-frequency rectifier diode 1N4007 (forward current 1A, reverse voltage 1000V).
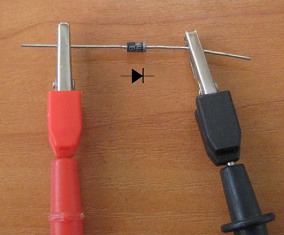
Figure 7. Forward rectifier diode test
The wide bright ring at the right end of the diode, as a rule, symbolizes the output of the cathode, so the probes are connected in the conductive direction. In this case, a direct voltage drop on pn junction diode, which corresponds to silicon-based semiconductors. The result is shown in Figure 8.
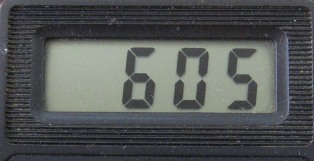
Figure 8. The diode inverts forward
If the Schottky barrier diode rings in the same way, the result will be slightly different.
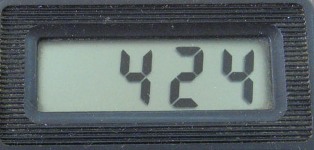
Figure 9. Forward voltage drop across a diode with a Schottky barrier
If the probes are interchanged, the diode will turn on in the opposite direction, the unit will appear on the display, as in Figure 6. Such results are obtained if the diode is working. But two more options are possible.
If, when connecting the probes, the device will beep, an audible signal will sound, then the diode is simply short-circuited, or broken. When you switch the probes to the opposite polarity, the sound signal, most likely, will not stop.
Another option is that, regardless of the direction in which the probes are turned on, one is displayed.In this case, they say that the diode is in a cliff, or simply burned out, as they say, to holes. In exactly the same way, when paging with a multimeter, p-n junctions of transistors behave. Checking them is no more difficult than a separate diode.
How to test a bipolar transistor
When the transistor rings with a multimeter transistor It should not be considered as an amplifying device with all its inherent properties, but as series-connected, moreover, counter-diodes, as shown in Figure 10.
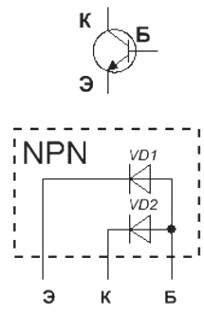
Figure 10. Transistor as diodes connected in series. Circuit for dialing
Now you need to connect the red (positive) output of the ohmmeter to the output of the base, and touch the emitter and collector outputs in black, in turn, the readings will be the same as when the diode rings in the forward direction. The measurement process and the result are shown in Figures 11 and 12.
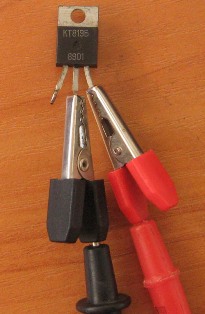
Figure 11. Crocodile clips will always help
Figure 12. The display shows the voltage drop at the p-n junctions of the transistor when the ohmmeter is turned on directly
If you connect black to the base instead of the red probe, the transitions will shift in the opposite direction, close, and the unit will appear on the display, as if during a break. This is how a functioning transistor behaves when checking.
But it may happen that when the junction of the p-n junction rings, an audible signal will sound, or one will be displayed for any direction in which the measuring probes are turned on. This indicates that the transistor is faulty.
Even with the correct behavior of the collector and emitter junctions, it is too early to judge the health of the transistor. Do not forget to ring in both directions the conclusions of KE. In any direction, the display should show the same unit. But sometimes it happens that even with healthy transitions B-E, B-K, the conclusions of K-E are short-circuited and an audible signal is heard.
The above is true for transistors of the n-p-n structure. The same considerations should be followed when checking p-n-p transistors, but in this case the red and black probes will have to be interchanged. Read more about this here: How to check the transistor
Boris Aladyshkin
See also at bgv.electricianexp.com
:

