Categories: Sharing experience, Electrician Secrets, Electrician at home
Number of views: 93597
Comments on the article: 4
Replacing wiring. Little tricks
 The article will be interesting to people who decided to independently change the wiring in the apartment, house.
If you believe the statistics, the average homeowner (sorry for the officialdom) makes cosmetic repairs every 3-5 years, major repairs - once every 8-12 years. What is a facelift? This is a replacement for wallpaper, painting the ceiling, walls, windows, batteries ... That is, repair without significant investments.
Overhaul implies something more that requires significant financial costs. With major repairs, many change plumbing, heating appliances, tiles in bathrooms and in the kitchen. Someone is changing the flooring. Instead of old linoleum, they lay a laminate. There are many options. Everyone makes repairs based on their financial capabilities.
In the process of repair, do not forget about wiring replacement. If you have some free time, and you are friends with electricity, then you can significantly save on work on replacing wiring. Although, in fairness, it is worth emphasizing that such a responsible work should still be entrusted to professionals.
So. We will proceed from the fact that you decide to undertake the work of replacing the wiring yourself. Your wiring will be hidden, that is, under a layer of plaster. If you have already plastered the walls, you need to make strobes, into which the wire will then be laid.
Maybe someone does not know what is a strob. A stroba is such a groove into which a wire is laid. Just want to note that all the strobes should be horizontal and vertical. Horizontal strobes, according to the rules, should be made under the ceiling. The distance from the ceiling is 200-250 mm. Vertical strobes are made directly to sockets and switches.
 How to make these same grooves-shrobes? So that it was fast and beautiful. To begin, draw a route along which the strobe will pass in the future. To do this, you can use a chop cord or a long ruler.
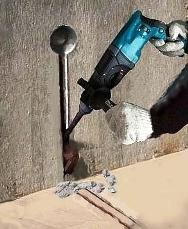
There are two ways to make strobes. The first is with a punch. To do this, holes with a depth of 25-30 mm are drilled along the drawn line, then make the groove itself with a puncher. The second way is to use a specially designed tool for this -chipper.
What is a chipper? This is a powerful angle grinder, popularly referred to as a “grinder”, on which 2 concrete discs are mounted. The disks are protected by a special casing to which the hose from an industrial vacuum cleaner is attached. A vacuum cleaner sucks dust (sorry for the pun), which will be a lot during the cutting of bricks, concrete ...
But the chipper is a purely professional tool, and it makes no sense to buy it for one-time work. You can certainly rent it, but you can make it yourself, though without a vacuum cleaner. In order to make an impromptu wall chaser, you will need two discs for concrete and the Bulgarian herself.
The grinder should be powerful enough, from 2 kW and above. Discs with a diameter of 230 mm usually go to such a tool. You also need to take a size smaller than 180 mm, thereby significantly increasing the tool life.
You put the first disk in its standard place, then you need to pick up fitula washers so that they fit tightly on the shaft axis. The outer diameter of the washers should be 35-45 mm. Next, install the second disk and tighten the nut.
Before starting work, do not forget about safety. We use goggles, as there will be a lot of dust, be sure to put on a respirator, open all windows and go ...
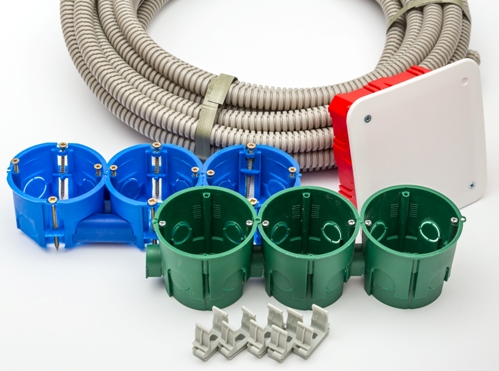
At the intersection of vertical and horizontal gates, dose (soldering) boxes are installed where the wires are switched.Typically, dose boxes are mounted above the switch at the entrance. If you plan to share the lighting and sockets into 2 independent groups, then there should be two doses, respectively. It is not allowed to bring 2 different groups into one dose box.
Recently, the so-called dose-free wiring installation has been widely used. What is the point. All wire switching is done directly in the socket. For this, special deep rosets are acquired.
If the standard undergrowth has a depth of 45-50 mm, then the increased -75-90 mm. This distance is enough for switching wires. After switching, you can install sockets and switches. This method is convenient in that there is almost always access to the junction box. No need to break the wall coverings, as is the case with classic installation and electrical wiring repair.
After reading everything that is written above, please think carefully whether you should undertake such a responsible job yourself, or still entrust the electrical work to professionals who have more experience and the tool is all right.

See also at bgv.electricianexp.com
:
