Categories: Featured Articles » Sources of light
Number of views: 7025
Comments on the article: 0
Calculation, selection and connection scheme of the controller for RGB-tape
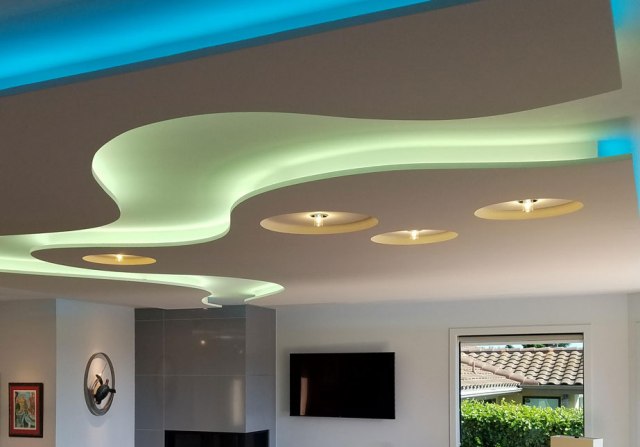
RGB tapes are designed to create adjustable backlighting. Using the controller, you can set the hue, brightness of the glow of the LED strip or choose a program for dynamic color change. Let's talk about how to choose an RGB controller and how to connect it.
Types of RGB controllers
Multi-color LED strip composed LED type SMD 5050 in the case of which there are three crystals, each of which glows in a certain color:
-
Red (R);
-
Green (G);
-
In blue (B).
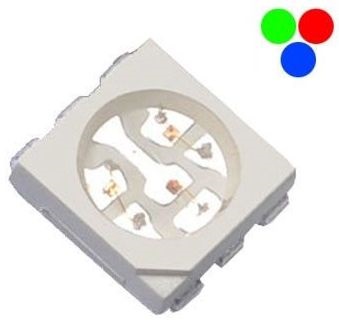
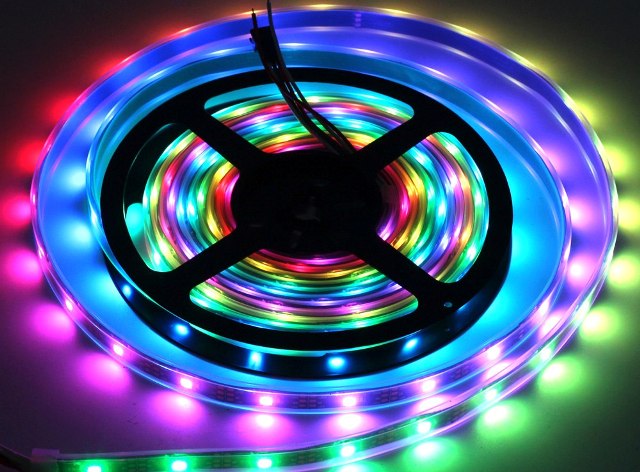
As a result, each LED can emit an almost unlimited number of shades.
There are RGB-tapes, which consist of single-color LEDs of other types, for example, SMD 3528 or others. In them, each LED shines in one color. Their use and controllers for them are essentially no different from the previous view.
Power is connected via 4 wires (3 colors and a common plus). You can connect each of the colors directly (the negative wire from the power source is usually connected to R, G or B) if you do not need adjustment and dynamic lighting.
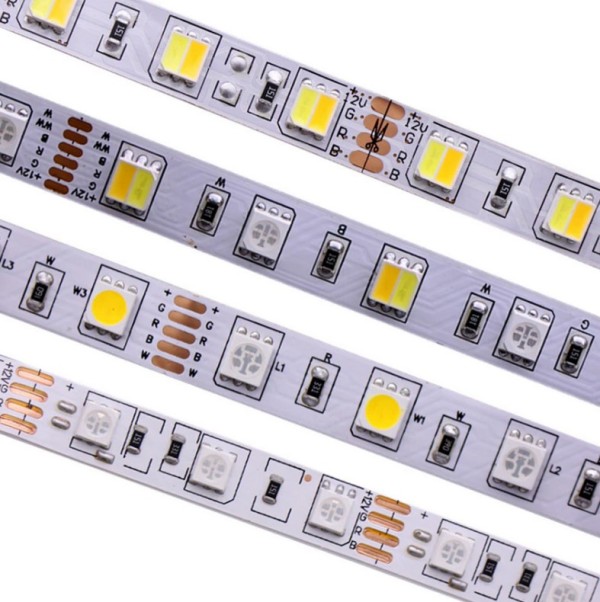
But with RGBW and RGBWW you need to be more careful when choosing controllers, amplifiers and connectors for connection. Here, in addition to three colors, white LEDs are fed in a separate line.
The differences between RGBW and RGBWW are that in the first case, we have one LED that is warm, neutral or cold, and in the second, two LEDs - one “warm” and one “cold”. Therefore, control is no longer carried out on 4, but on 5 or 6 wires. Read more about color LEDs here:Device and principle of operation of RGB LEDs
ALL CALCULATIONS, RECOMMENDATIONS AND WIRING DIAGRAMS SIMILAR AS FOR RGB, SO FOR RGBW, RGBWW-CONTROLLERS! DIFFERENCES ARE CONCLUDED ONLY IN THE NUMBER OF WIRES FOR CONNECTION!
Power circuit calculation
Before choosing a controller, you should determine how you will power led strip. Details about the types of power supplies and wiring diagrams we wrote in the article How to calculate and choose a power supply for LED strip
In short, the power supply is chosen with a margin of 20-40% in current or power. Suppose you bought a 5-meter bay 12 volt LED strip SMD 5050 60 pcs / m. It consumes 14.4 watts per meter.
Total power consumption will be:
14.4 * 5 = 72 watts
A current:
72/12 = 6 amp
This is the consumption of the entire tape when all colors are turned on at full power. We have three channels - red, green and blue, which means each channel consumes:
72/3 = 24 watts
What current equals:
24/12 = 2 amp
Why do I need to know the consumption of each channel? This is necessary for the selection of the controller. The fact is that on the controllers the manufacturer sometimes indicates the total power or current strength, and sometimes the power or current per channel. In order not to get confused, pay attention to labels like:
2A per channel or 2A / ch or 3 * 2A
This means that each one can connect an LED strip to the controller whose current consumption does not exceed 2 amperes per channel.
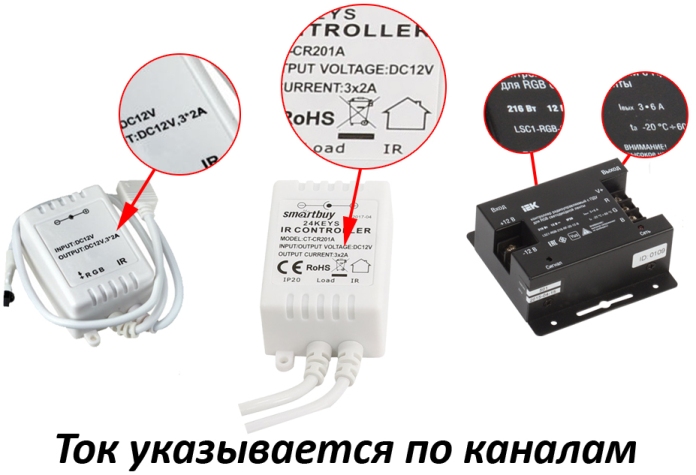
The controller current should also be no less than the current consumed by the tape, but better with a margin, as for power supplies.
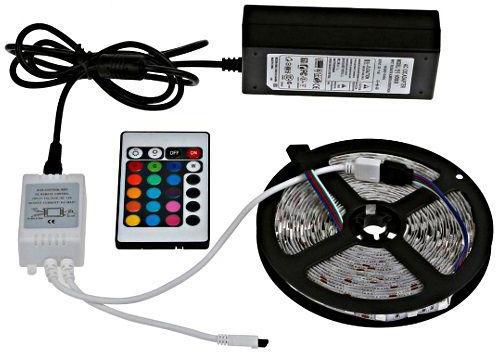
At the same time, sets of RGB tapes with a power supply and a controller were widely used on the market. They are convenient to use.
Types of Controllers
Most controllers for LED strips are similar in function. What are they like?
First of all, they may differ in the method of remote control:
-
Remote control with IR LED;
-
Radio control.
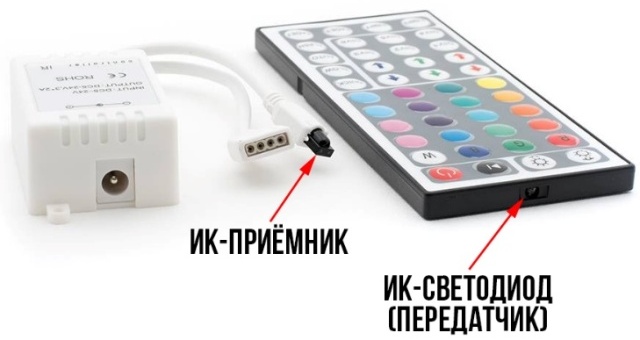
The first cheapest and most common option is remote controls with an infrared LED.Their feature is that when controlling, you must direct the remote control towards the receiver, as on household appliances (TVs, etc.). Which in some cases causes difficulties both with the correct installation of the controller with the receiver, and during operation as a whole. Such controllers can be distinguished by a thin wire receivere.
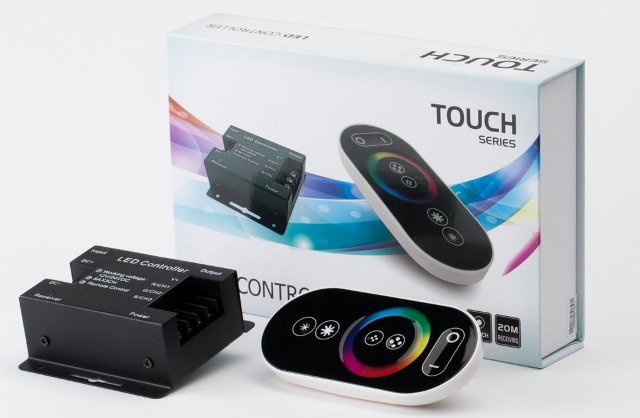
Radio controls, in turn, do not suffer from this problem - they do not care about the direction of the signal. Data transmission is carried out by radio channels. The frequency of which depends on the particular product, by the way, there are RGB controllers that work via Wi-Fi and are controlled through the application on the smartphone. For radio controllers, this is usually indicated by a phrase such as “RF-controller” or “wireless” in the marking.
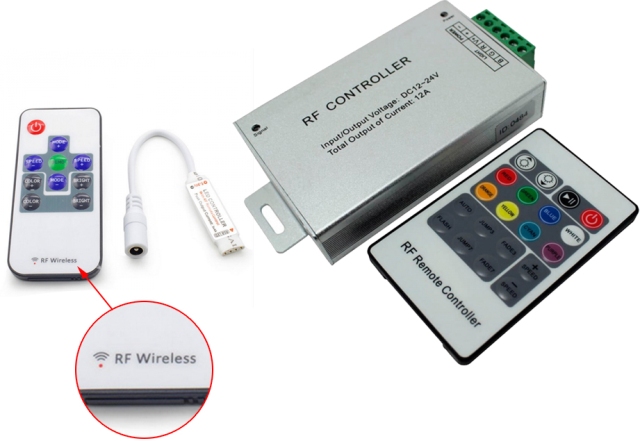
Typical functions for each controller are approximately the same:
-
Setting the dynamic color change mode (flickering, smooth transitions and other types of so-called “chasing”).
-
Setting a static (unchanging color) or so-called "Fixing" mode.
-
Brightness adjustment.
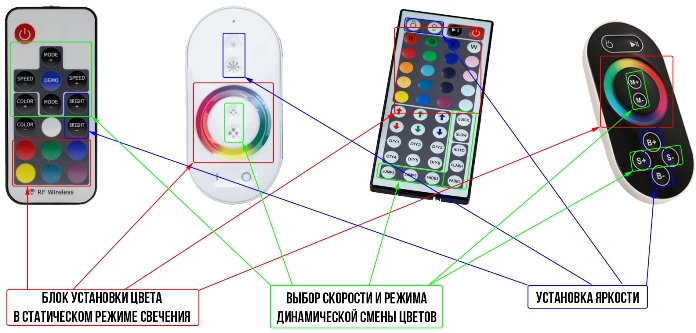
When buying, pay attention to the class of dust and moisture protection of the controller. It must correspond to the installation site, for dry rooms - any, even IP20, for the street - IP65 and above! "Street" controllers are usually made in a metal case, parts of which are fastened with screws with sealing gum on adjacent surfaces and places of output wires.
Wiring diagrams
Now let's talk about how to connect an RGB tape to a controller.
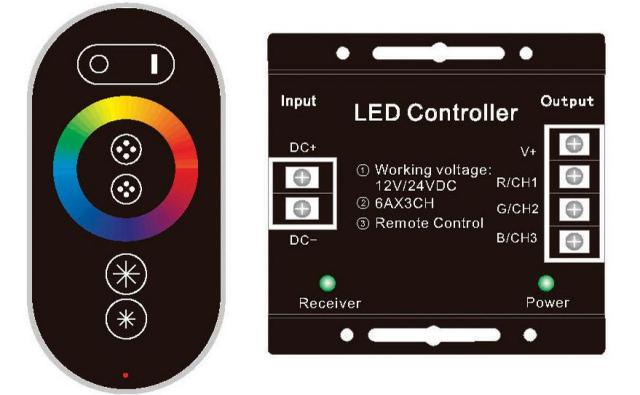
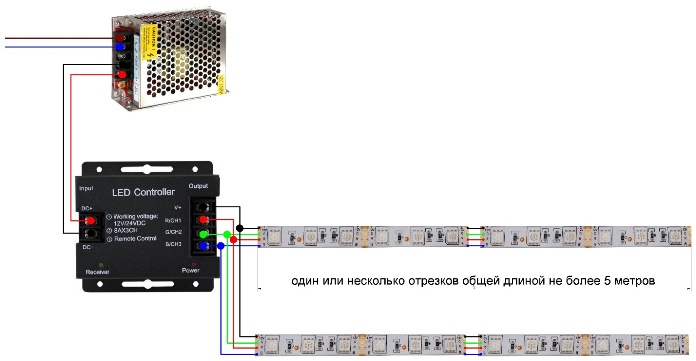
The simplest option is to connect a segment up to 5 meters long to one controller of suitable power.
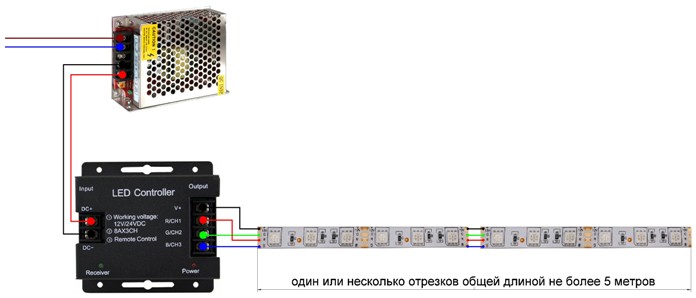
FOR MULTI-COLORED BANDS, THE SAME RULES SHOULD BE FOUND, THAT FOR SINGLE-COLORED BONDS, THE LENGTH OF ONE LINE SHOULD NOT EXCEED 5 METERS, EVERY FOLLOWING 5 METER CUTS OR TROUBLESHOOTING!
If the total length of the tape is more than five meters, then you must either connect each segment according to the above diagram, or each segment directly to the controller as shown below.
If the controller’s power is not enough for all segments of the tape, but you cannot find a more powerful one on sale, then you have two options:
Connect each of the segments according to the first scheme or connect several controllers from one power supply unit. The option is quite simple, but it has a big drawback - each section of the backlight will be controlled by a separate remote control and the color change, and dynamic modes will not be synchronized, which is unlikely to be pleasant when arranging the illumination of the ceiling and other elements of the interior of the room.
To all the backlight is regulated synchronously use RGB amplifiers. This is such a device that has an input for supplying an RGB signal from the master controller (in the figure below with a dashed line) or from the end of one of the tape segments.
The input of the RSL amplifier consumes a small current. In addition to the signal from the master controller, power is supplied to the amplifier from the power supply, after which new segments of RSL tapes are already powered from the amplifier. You see the scheme of such a solution in the figure below.
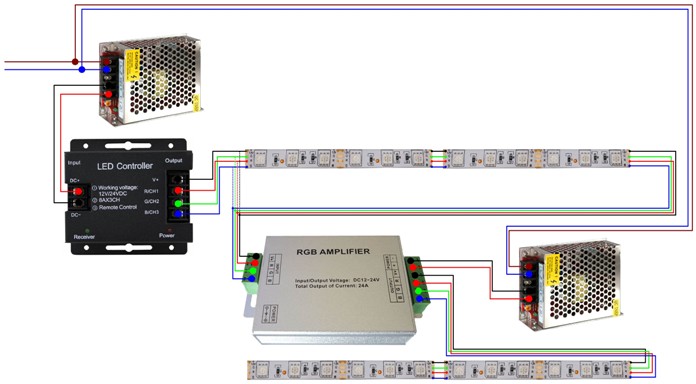
These are the three basic schemes for connecting RGB LED strips. They are quite simple, but for beginners there may be a problem with connecting the amplifier, so carefully read what is written on its case, the terminal assignment is usually given on the front panel.
See also at bgv.electricianexp.com
:
