Categories: Sources of light, Repair of household appliances
Number of views: 65004
Comments on the article: 3
LED strip malfunctions and repair methods
LED strips are widely used in decorative lighting and functional lighting, but from time to time they fail completely or partially, in connection with which there is a need for their repair or replacement. Often, you can do just replacing a small part of it, which will reduce repair costs. In this article, we will cover typical problems with LED tape.
Before starting the discussion, I note that the main emphasis will be placed on common tapes with 12V power, 24V tapes are similar in design, and in the end we will consider the features of repairing network (220V) tapes.
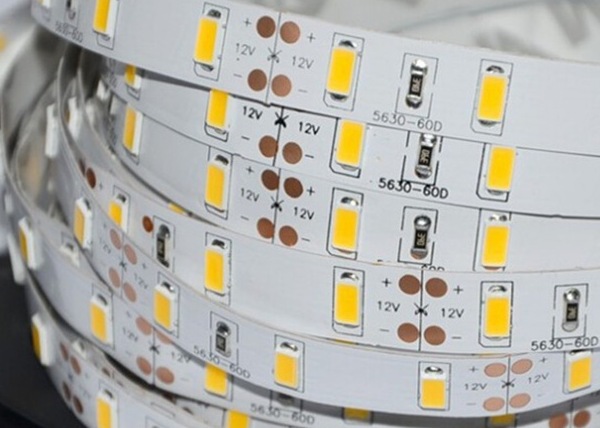
Design
Before you consider the malfunction, you need to figure out what it consists of. LED Strip Light and why is it flexible. Led tape can be divided into two parts:
-
Flexible circuit board;
-
LEDs and current limiting resistors.
On one side, the flexible circuit board is coated with adhesive.
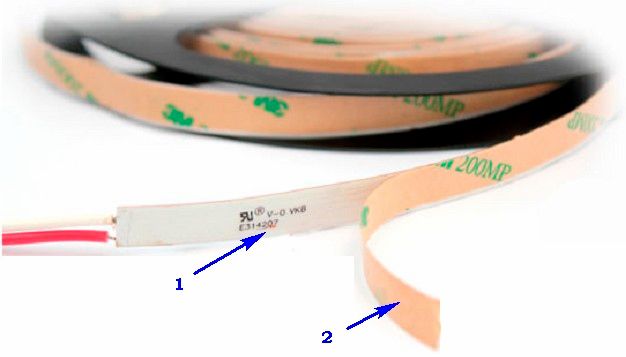
On the second side, a metallized layer is applied - conductive paths. They are made in the form of thin copper strips. SMD LEDs and current limiting resistors are soldered to the conductive paths.
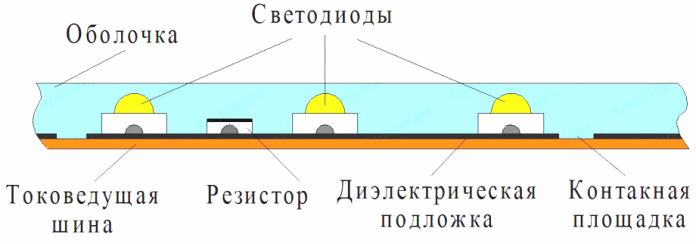
The front side can be painted white, then the tracks are not visible, they can be considered with a close examination of the structure of the tape.
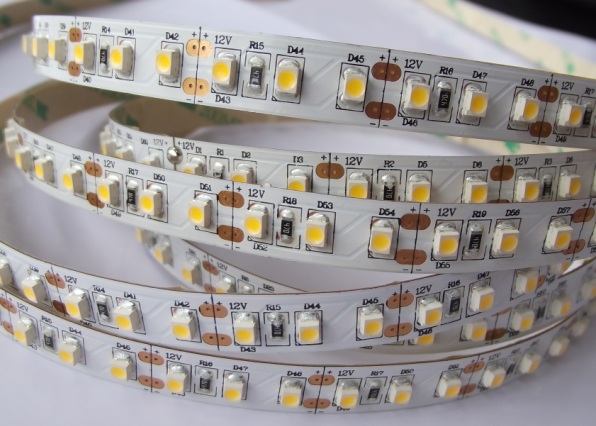
If we are talking about white LEDs, then for their glow you need a voltage of about 3V, and the tape is powered by 12, how is this done? The tape consists of segments of three series-connected LEDs and 1 or more resistors.
For the operation of three series-connected LEDs, 8.5-9.5V is needed, the resistors are selected in such a way as to ensure the rated current of the LEDs and burn an extra couple of volts. Each such segment is powered by 12V.
In the tape, such segments are three LEDs connected in parallel. Therefore, it can be cut in specially marked places for any length. The cut location is the junction of two segments.

Such a tape is connected to a household electrical network with a voltage of 220V AC using a power supply, usually pulsed with an output voltage of 12V DC.
Now that you know what the LED strip consists of, let's move on to troubleshooting.
Fault # 1 - the entire tape is off
If, when turning on the power, it turns out that the tape does not light at all, then you must first make sure: is the power supply plugged in? Then check if there is voltage in the outlet, it is better to do this with a test lamp or a multimeter.
If you check indicator screwdriver, then the maximum that can be found out is the presence of a phase, and there may not be a zero. Another option is to check with a two-wire voltage indicator.
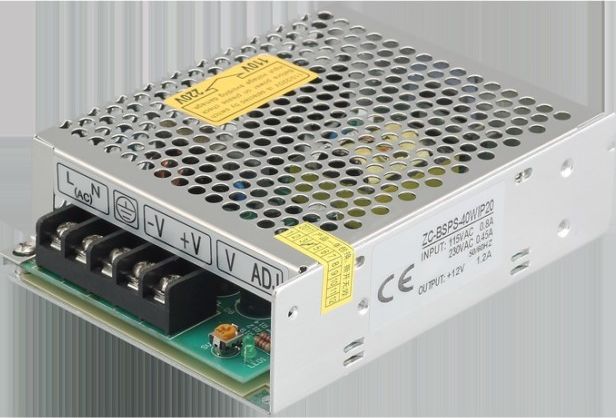
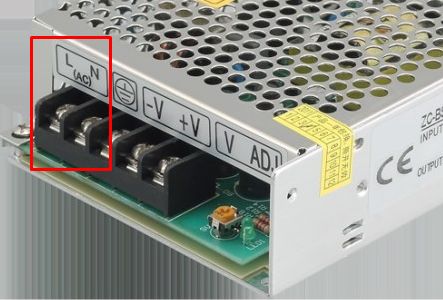
If the outlet is working, we check whether the wire through which 220V is supplied to the power supply is intact. To do this, measure the voltage or check its presence with a test lamp on the terminals of the power supply to which it is connected, usually these terminals are indicated by the letters L (line) and N (neutral), or the sign "~".
If there is voltage, then we check the 12V voltage at the output of the power supply, again with a multimeter or a 12V test lamp, for example, from the side lights of a car, as an option, with a segment of a known working LED strip.
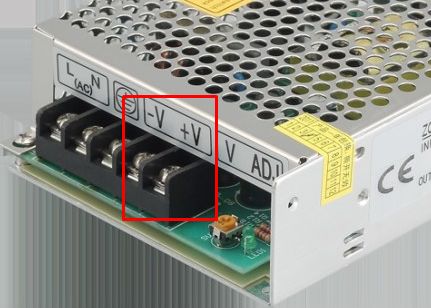
If there is no voltage, then you need to replace or repair the power supply for the LED strip, the procedure for its diagnosis and repair was described in the article earlier.
If there is voltage, you need to check the serviceability of the wire and whether there is voltage on the tape. If there is no voltage at the contacts where the wire is connected to the tape, then the wire is probably damaged, you must either replace it or find the damage and restore its integrity.
If the voltage comes to the tape, you need to check the quality of the contact between the wire and the contact pad of the tape. The wire can be soldered, then check the quality of the soldering, it is better to solder again, since with the visible integrity of the soldering, there may be no contact.
And the terminal strip can be used to connect the LED strip, then you need to check if there is contact between the spring-loaded plate and the contact pad, it may have oxidized, then it needs to be cleaned of oxide and the structure should work.
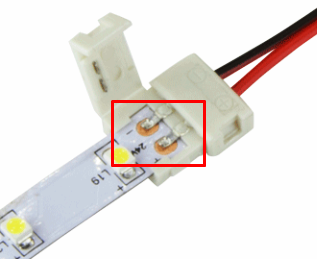
If this does not help the problem is in the tape, or rather in a flexible printed circuit board. Since the tape does not shine completely, it will be logical to conclude that the track in the first segment has burned out. To check this, you can supply power to the terminals of the second or third segments of the tape, and so on, until it lights up. To do this, you can choose one of the options:
1. To apply power by bridging with metal tweezers the positive contact pads from those to which the power cord is connected to those that are at the junction of the first and subsequent segments. Most likely, one track burned - plus or minus, hardly both could burn at the same time.
2. Solder the jumper or the power wires themselves to the subsequent segments.
3. Apply power from a 12V battery, suitable from an uninterruptible power supply or auto-moto equipment.
If there is a silicone coating on the tape to supply power to the pads, the coating must be cut off or pierced with a needle.

Having localized the burned-out area, it needs to be replaced by docking a new piece of tape with the remaining one.
Interesting:
The tracks could not burn, but tear. The LED strip, like cable products, has such a parameter as the minimum bend radius, due to the flexibility class. Usually about 5cm. This is especially important if the tape is mounted so that it wraps around a thin pipe.
Malfunction # 1.2 - the tape burns to the middle
This is a special case of the situation described above. The reason is similar - in one of the segments the track burned out. The methods for diagnosing and repairing LED strip are the same - apply power to sections of the strip located after the place that failed.
Malfunction # 2 - all or part of the tape flickers
The cause of the flickering of the entire tape may be:
1. Problems with the power supply. You need to make sure that it is working properly by either connecting the tape to a known working voltage source, or to the battery. Or, on the contrary, you can connect a known-good tape or light bulb to the power supply.
2. If the power supply turned out to be normal, then you need to make sure the quality of the contact between its terminals and the 12V wires of the LED backlight. Then check the connection of the power wires and the tape itself.
3. If this also turned out to be normal, then check the condition of the tape by supplying power to other pads, as described above. If you could find the problem area, you need to replace it.
4. Perhaps the LEDs have simply reached the end of their life due to aging, overheating, or improper power. Then the entire tape needs to be replaced.
Malfunction # 3 - one or more pieces of the LED strip is not lit or flickering
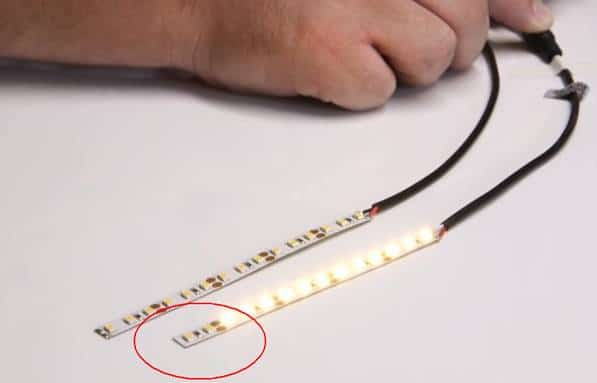
Individual segments may shine poorly, flicker, or go out altogether. This may occur because a resistor or one of the LEDs in the series-connected circuit is burned out or damaged. For the same reason, an increased brightness of a single section may be observed. Perhaps the elements are normal, but the problems, again, are with the printed circuit boards.
It is best to immediately cut such a section and replace it with a working one.
220V tape - three main differences
With a tape designed to be powered from the mains, everything is similar except for several factors:
1. The multiplicity of the cut of the tape is different - 50, 100 cm
2. Since all LED technology is powered by direct current, it is used to power the network tape two-half mains voltage rectifier - a diode bridge, usually installed near the plug in a small box. It can also fail - for replacement, anyone designed for a voltage of more than 400 V.
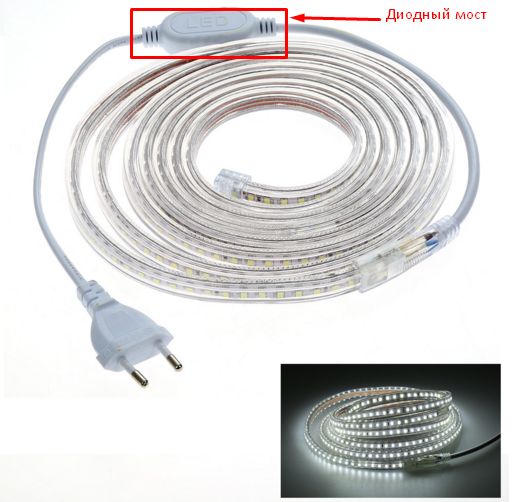
3. The rectified voltage reaches 310 Volts, do not climb with your bare hands to the tape connected to the network.
Conclusion - the three main problems: quality, installation and power supplies
Tapes or fragments thereof are often burned out without modifying the claimed resource. Although LEDs can shine for 30,000 thousand hours, but this number is significantly reduced if the rules for working with them are not followed. To summarize:
1. In cheap tapes - cheap LEDs, they shine worse, get hotter and go out faster. By the way, LEDs are catastrophically afraid of exceeding the maximum permissible operating temperature, it is better that it does not go beyond 50-60 degrees.
2. Incorrect installation leads to overheating of the LEDs and damage to the tracks. Too tight sticking of the tape leads to the fact that the whole structure is heated more strongly. It is necessary to leave a small gap between the adjacent stripes of the tape, at least 1-3 of its width.
Also, do not forget that you can not allow bending of the tape with a radius of less than 5 cm. Especially avoid fractures at a right angle and sharper. It is better to cut the tape, stick to the surfaces, and at their corner, make a connection either by soldering or by clamping.
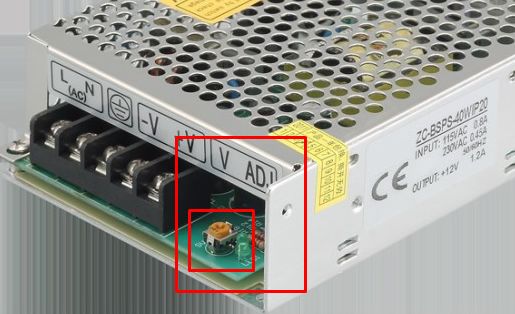
3. Do not exceed the rated supply voltage. It is better to lower it from 12 to 11.5 - 11.7V. This can be done by rotating the tuning resistor, usually it is installed near the terminals for connecting wires. An increased voltage entails an increased current, which will warm up the LEDs, the consequences are described above.
See also at bgv.electricianexp.com
:
