Categories: Electrician at home, Electric installation work
Number of views: 57403
Comments on the article: 4
How to install and connect a wall lamp
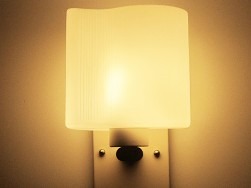 Indoor artificial lighting is divided into:
-
general, whose lamps are usually located on the ceiling;
-
local with wall sources used to create improved working conditions or to address specific design goals.
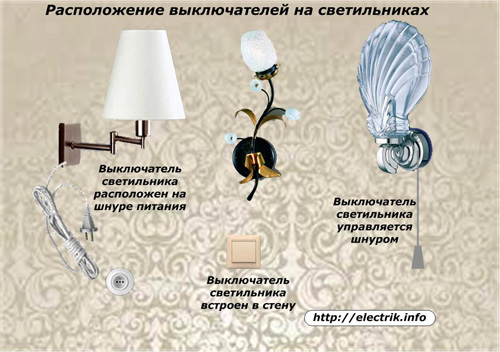
According to the principle of using switches, wall lamps have designs when the switch:
-
located on the power cord of the lamp with a plug that plugs into an outlet;
-
mounted in the wall and connected by wiring hidden in a strob inside the wall;
-
installed inside the lamp housing, controlled remotely, for example, using a cord or over the air via a remote control.
Recently, spotlights and spots that create directional light have become widely used. According to the control method, they can use one of the above inclusion options.
Installation and connection of a wall lamp involves the following sequence of work:
-
definition of tasks of local lighting;
-
selection and acquisition of a specific model of a light source;
-
Accurate marking of drilling sites using a level for attaching the housing to the wall;
-
drilling holes;
-
housing installation;
-
lamp installation and wiring;
-
circuit check and trial inclusion.
In some cases, the installation of a wall lamp may additionally require gating (cutting internal cavities) of the walls and the installation of a switch.
The labor-intensive, dirty work of processing concrete surfaces of walls can be saved by laying the cable with wires in an open way and installing them in special enclosed boxes. With this method, an outdoor switch can be used.
The choice of the lamp according to electrical characteristics
The light source in modern wall-mounted lighting devices can be:
-
bulbs with an ordinary filament;
-
lamps of improved design filled with special gases, for example, halogen models;
-
fluorescent or energy-saving lamps;
-
LED spotlights.
When choosing a lamp, you must pay attention to:
-
a method for scattering light flux and its power;
-
value and type of supply voltage;
-
consumed electric power and the availability of its reserve;
-
management method;
-
type of lamps used.
Many fixtures are limited by the design of the materials used for heating. The heat from a working light bulb, which is incorrectly selected in terms of power, can melt or deform beautiful decorative elements. therefore, it is impossible to screw bulbs of higher ratings into the lamp holder than indicated by the technical documentation.
For local lighting inside rooms with high humidity (bath, pool), sealed lamps and switches are used, protective devices are used.
Marking the place and preparing for installation
The picture shows the preparation of holes, taking into account already cable routed and wires removed from it for connection to the lamp. This method is well suited for those cases when the apartment is scheduled for repair with the conversion of the wiring diagram.
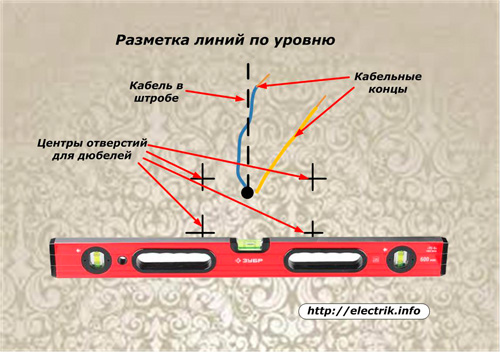
Wall lights are mounted to the wall through holes in the housing or a special mounting plate. The location of these holes is important to accurately plan, orientate on the level of the horizon and draw.
For this purpose, an ordinary bubble level or more complex constructions of levels with a laser beam are used,which greatly facilitate the marking work on the same location of switches and sockets at the same height relative to the floor around the entire perimeter of the room.
See also: How is the marking performed during wiring
Drilling holes in the wall
Concrete slabs, silicate brick, foam concrete building blocks and other materials of which the walls are made, have different strength characteristics, and have a different effect on the drill material.
For quick, high-quality creation of holes in them, it is necessary to select specially made drills, use a professional tool.
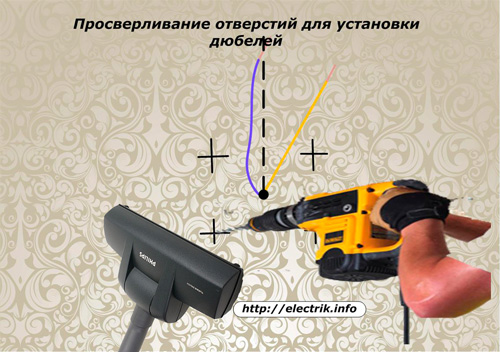
Powerful punchers quickly cope with dense strong concrete, impact drills drill a brick wall well, low-power drills can be used to drill holes in wood, drywall, plastic materials.
Drilling is always associated with the formation of building chips and the release of dust that settles on nearby objects, spreads throughout the room. To avoid this, careful owners apply the piping tip of a working vacuum cleaner to the drilling site. All crumbs and dust generated during operation are collected in a vacuum cleaner, and not on the surrounding furniture.
Ways of fastening screws in the wall
Typically, wall lights have a small weight; for their fastening, you can use ordinary screws, under which plastic dowels are selected. Their diameter should be the same as the drill used.
The insertion of plugs from hardwood into the prepared holes for the subsequent screwing of self-tapping screws is quite acceptable. But this time-consuming process requires certain skills and experience. The use of standard plastic dowels facilitates the work, improves the quality of retention of fasteners in the wall.
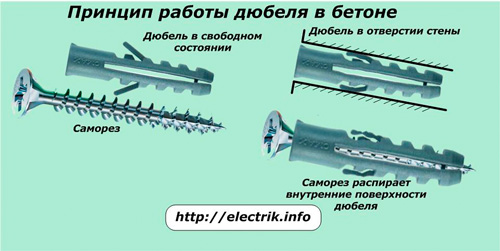
Such dowels have a special design in the form of antennae and protrusions with a prepared internal cavity for placement of a self-tapping screw. When the dowel is inserted inside the hole, then its external surfaces are deformed, facilitating entry. When screwing in the screw, the dowel material bursts, tightly crimping inside the wall.
This is how dowels used in dense materials work.
However, in practice, there are cases when the lamp is required to be mounted on a thin wall of the interior partition, for which there is an air cavity. For such cases, special folding folding dowels, called the “Butterfly”, are designed. Their mounting method is shown in the figure.
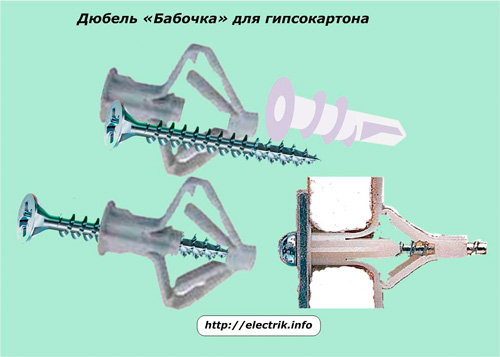
In the expanded form, the dowel has the shape of an ordinary cylinder and freely passes through the hole prepared for fastening. When screwing a self-tapping screw, its distal part approaches the front part, and the whole structure changes its shape so that it tightly compresses thin-walled drywall on all sides, which ensures reliable bonding with it.
Numerous dowel manufacturers produce universal designs that can hold self-tapping screws in solid media or work on thin walls.
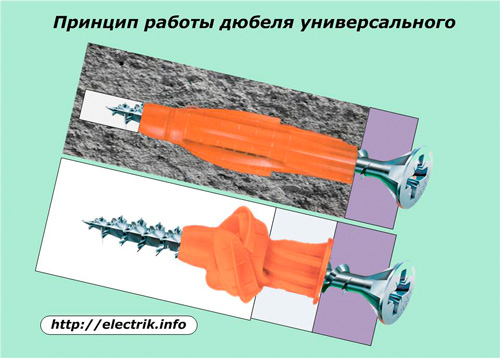
In concrete, brick and similar holes (top diagram), the material of the dowel is bursting in the usual way when screwing in the screw. When the screw is screwed into a thin partition (bottom picture), then when screwing it on, the far end of the dowel is moved forward and screwed up, forming a knot assembled in one place that holds the self-tapping screw from the back and does not allow it to fall out.
After placing the dowels in the holes through them, a mounting case or mounting plate is installed, and then screws are screwed. To do this, you can use a cordless screwdriver, a simple electric drill or even an ordinary screwdriver.
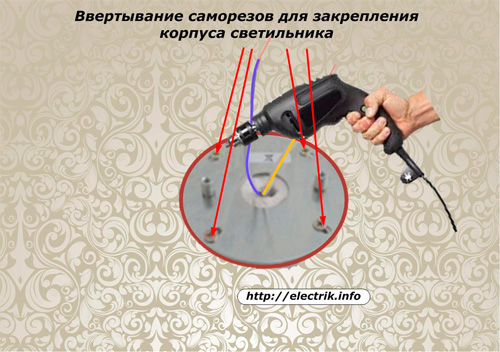
All other parts of the luminaire are mounted on the screwed-in casing, which, in principle, is a decorative fixture for connecting the bulb.
Features of the use of point sources
Specific effects of local lighting create directional spotlights. Their rays rush to certain objects, highlighting their surface, emphasizing the original shape of the illuminated objects.
Point sources have small dimensions and low electricity consumption, but at the same time they create sufficient light fluxes. The ways of fixing such lamps in a vertical or horizontal plane practically do not differ from each other.
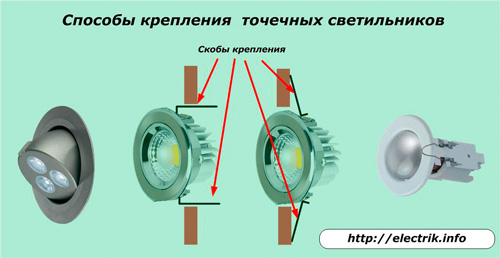
Such models are usually installed on thin-walled partitions made of drywall, multilayer plywood or plastic. To do this, they need to cut circular slots for mounting the lamp.
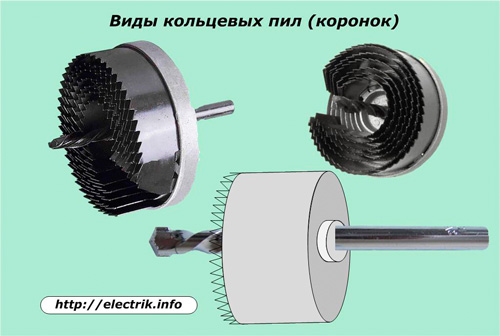
These special ring saws, which are called crowns, serve these purposes. They must be selected according to the diameter of the cut hole and inserted into the drill chuck. The central drill is installed in a marked point on a vertical surface and a hole is cut out in the partition.
The crown shown in the figure below is used for hard and dense materials.
After the hole is cut, connected to the lamp through the terminal blocks are connected stranded wires. They are laid in advance when implementing a prepared design project. Then the lamp with wires is inserted inside the prepared hole so that its mounting spring-loaded antennae-brackets are brought into the hole. They are held with fingers and then released. The energy of the charged spring-staples reliably holds the body in a thin-walled partition.
Spotlights are usually grouped to enhance the visual effect and connected from a single switch button. They are placed on the upper part of the wall near the ceiling using a frame made of metal corners or wooden blocks, on which thin-walled sheets are fixed.
Electrical work
A typical wiring diagram for a wall lamp is shown in the figure.
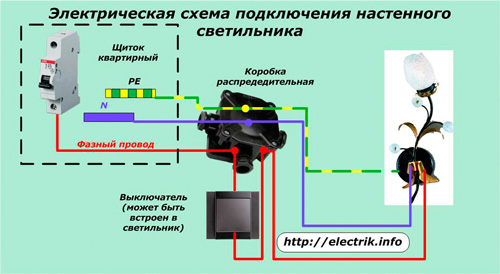
The voltage from the input to the apartment after the counter is used to power the light bulb. The phase wire must be taken through the protective circuit breaker located inside the apartment panel and passed through the junction box of the room and the light switch, which can be mounted even in the lamp housing.
The zero wire from its N bus goes directly to the bulb through the junction box and cartridge. The protective PE conductor is also connected from its own PE bus to the lamp housing using the contacts of the junction box. In old building schemes where wiring works by TN-C system, PE conductor and its shink are absent.
In the same way, spotlights of directional light work.
Wall lights with integrated switch and outer cord with a plug to connect just hang around the outlet from which they are powered.
To control a group of spotlights or spots from one switch, all the cartridges of this unit are connected in parallel.
Among modern wall lights there is another separate group of light sources controlled from a motion sensor. Questions describing their installation and configuration is the topic of a separate article.
Read also:Wiring diagrams in an apartment and a house - the best articles
See also at bgv.electricianexp.com
:
