Categories: Featured Articles » Electrician at home
Number of views: 59338
Comments on the article: 1
Mounting electrical equipment on a DIN rail
 Somehow imperceptibly in the field of domestic and industrial wiring, a new era has come - era of modular equipment. “Modular” means compact, uniform in size and easy to install. Well, with compactness and unification, everything seems to be clear. And ease of installation - what is it?
In the same apartment switchboards today there are so many different equipment! Dozens of units. So let's try to imagine that each such unit is mounted in the old fashion, with screws.
So:
- take the first circuit breaker,
- mark the back wall of the flap,
- we drill according to the markup,
- insert the screws into the switch housing,
- catch the screws on the back side with nuts
- tighten the screws, holding the nuts ...
 Uff ...! It seems that one machine with a sin was fixed in half. There’s nothing left: a dozen assault rifles, a pair of RCD and electric meter.
Fasten-fasten ... Ay-ah-ah! It seems that there is not enough space in the shield. After all, it is rather difficult to calculate it, and if the first device was placed unsuccessfully, then all the work is in any case worthless. Well, what can you do - we remove everything that we fastened with such difficulty, put aside the drilled-over-flap shield, take a new, bigger one, and again: mark, drill, fasten ...
Here are some of the prospects that awaited every electrician who undertook the installation and construction of an individual apartment electrical panel "From scratch", if it was before the appearance modular equipment and universal means of its fasteners - DIN rails.
It is not surprising that the apartment panels of those times did not differ in particular diversity: two or four automatic machines or traffic jams and an electric meter. After all, the more devices, the more labor needed to be invested in the assembly of the shield. In addition, screw fasteners themselves increase the dimensions of the equipment, and, consequently, the shield itself.
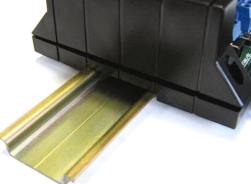
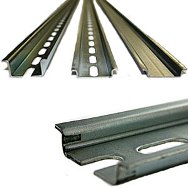
 But the DIN rail, developed at the German Institute for Standardization (DIN is also encrypted), by its appearance radically changed the situation. The most popular type of DIN rail, used today in almost all apartment shields, is the omega-shaped profile with a width of 35 mm and a height of 7.5 mm.
Bent edges - jaws - of such a DIN rail are designed to hold the equipment, and oblong holes on the base - universal perforation - for mounting the rail itself. A DIN rail is produced in a standard length of 2 meters, but it can, of course, be cut as you like. The DIN rail material is steel with a special anti-corrosion coating.
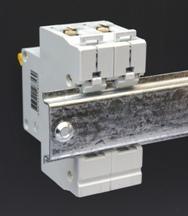
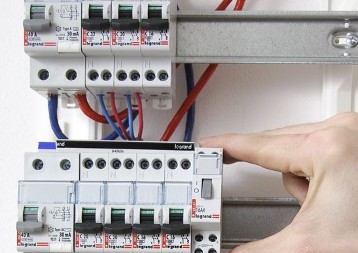
In order to fix the DIN rail, only two holes on the same horizontal line of any flat surface, for example, the same back wall of the apartment panel, are enough. And already the equipment itself is mounted on a rail in any quantity, as long as there is enough. Modular circuit breakers, counters, RCDs, starters, terminals, various relays and other equipment are based on special clips for DIN rail.
These clamps are usually two or four. The upper ones are fixed and simply placed on the edge of the rail, and the lower ones can be pulled off with a flat screwdriver. When the device is pressed against the DIN rail, the lower clip returns to its place either under the action of a spring, or by a simple press. To remove the device, simply pull back the lower clamps again.
After installing all the devices on the rail, there remains one more small problem: from the forces caused by the elastic deformation of the wires, the devices can move slightly along the rail and even jump off it. To prevent this from happening, you should use special locks - latches for DIN-rail.
They are rigidly mounted on both sides of the equipment on the rail and exclude any longitudinal movements. Although sometimes the edges of the rail are just slightly unbent with pliers from both ends.This, in principle, is as practical as the clips, but somehow less aesthetically pleasing.

Thus, installation and dismantling in the switchboard of any set of equipment when using a DIN rail takes a few minutes. It just looks like a child’s designer - just as easy and even nice. That's why DIN rail was loved by all electricians, and today it is part of almost any apartment electrical switchboard ShchRN or ShchRV.
See also at bgv.electricianexp.com
:
