Categories: Featured Articles » Electrician at home
Number of views: 227582
Comments on the article: 7
Plastic ducts (cable channels), how to fix the cable channel
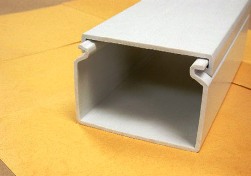 When there is a need for the device and installation of external wiring, preference is most often given cable channel. It’s understandable: the cable channel complies with the fire and electrical safety standards, and in addition, it just looks more advantageous in comparison with, for example, corrugated pipe wiring or, especially, open wiring.
However, the installation and closure of cable channels (ducts) is indeed the highest aerobatics of installing office and home electrical wiring. The variety of sizes, designs and properties of cable channels is so wide that there are no single rules that clearly establish the installation technology plastic boxesjust out of the question. Therefore, those who are going to deal with the cable channel for the first time can be given only some tips that are purely recommendatory in nature.
Advantages and disadvantages of cable channels:
Pros:
-
laborious work on grating and plastering floors are not needed;
-
easy access to cable;
-
additional protection for electrical conductors;
-
ease of installation;
-
the opportunity to embody modern design solutions.
Minuses:
-
do not always fit into the design of the room;
-
need extra space;
-
easy to break with careless use;
-
require a lot of additional accessories.
Choosing and buying cable channels
How to choose a cable channel? First of all, you need to decide what size your box should have. It is necessary that all cables fit freely into its containers, and that there is some margin that can subsequently come in handy. At the same time, the main cable channel, stretching along the ceiling at the top, it is better to choose a larger size, and a box designed for vertical taps to sockets and switches - a smaller one.
Then, you need to find out how many boxes we need for installation? We take into account that it is sold with standard “sticks” 2 meters long and is not cut in the store. Of course, the total length is best determined with a margin of at least 15-20 percent. During the work, some part of the box can be damaged and sent to marriage, but it may not work to buy exactly the same cable channel.
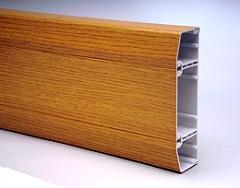 Cable channel color - this is a matter of personal taste, but it should be remembered that the white cable channel is sold in a much wider assortment than the box, made, say, “under the tree”.
Many manufacturers of plastic boxes, such as Legrand and Elekor, produce, in addition to the actual cable channel, various fittings to it, such as plugs, joints, corner transitions, tees, external and internal angles. It’s better not to save on these things and choose a box to which such accessories are sold, since it ennobles the appearance of the cable channel and greatly simplifies installation.
When buying a cable channel, you need to pay close attention to its quality. If the rough and uneven ends of the lids and boxes is not such a problem, then a poor-quality lock is already really a disaster.
For inexpensive and very common cable channels, for example, the company "Elecor" - this is a very common occurrence. Then the lid of the box is simply unable to stay in the lock and falls out, or, conversely, to close the box you need to knock on its lid, and from impact this entire plastic construction may burst, even if you use a mallet.
The normal box should open and close securely with your hands, without attachments. A particular piquancy to the cable channel locks is given by the fact that these defects are opened at the moment the box is mounted, the cable is laid and it remains only to close the lid.
Well, of course, do not forget about special junction boxes for external wiring in the cable channel. They should be immediately purchased in the required quantity and in harmony with the box in color, as well as in the number and size of standard openings for cable entry.
Preparation and installation of cable channels
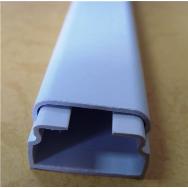 We start the preparation from the walls and ceiling of the room. If they are uneven, littered, and the geometry of the rooms leaves much to be desired, then you should not count on high-quality installation of plastic boxes. Inevitably there will be gaps between the surface of the walls and the duct, there will be distortions of the ducts, and visually it will be impossible to align them. Therefore, first of all, we align and display walls and ceilings.
Installation of plastic boxes can be done both before and after the finish decoration of the room. True, in the latter case, you will have to work with the utmost accuracy - you can’t hide any minor flaws.
Then we decide which tool we will need. For example, what will we cut the box? There is no consensus. Someone saws plastic with a metal sheet, someone has the skill to carefully cut with a knife and bite with side cutters, despite the fact that the cable channel often bursts from these tools. But the most productive tool for cutting boxes is angle grinder, that is, a grinder.
The latter, however, is a pity, because there is a lot of light dust clogging up absolutely everywhere when cutting plastic. For the same reason, while working as a grinder, we do not neglect the respirator - dust can settle in the lungs.
How to fix the cable channel
You can use a simple pencil to mark the boxes, but the choice of tools and materials for fasteners depends on the type of room walls. On wooden and painted walls, as well as on GVL, GKL, LSU and wallpaper, the cable channel can, in principle, simply be glued. Accordingly, you only need glue (liquid nails, for example). It is only necessary to take into account that before the glue dries completely, proceed to lay the cable and close the covers.
For fastening to a wooden wall, you can use ordinary screws. Then it will be needed screwdriver (better battery) with an elongated bat and a thin drill for metal - about 3 mm. With a drill, we prepare holes at the bottom of the box through which we screw the screws or screws into the wood.
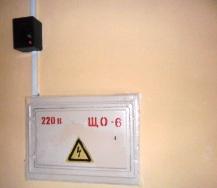 If the walls are concrete or brick, then the cable channel will have to be fastened with dowels and screws. The actions are as follows: we apply the drilled box to the wall, mark the holes with a pencil, punch them, insert the dowels and fasten the box with the same screwdriver or screwdriver.
The method is quite troublesome. Therefore, some do not drill the box, but drill the wall directly through the cable channel. This, of course, is faster, but the box can crack from the impacts of the drill or shift during drilling, and then you have to redo everything. Of course, when mounting a cable channel on a concrete wall, it is better to arm yourself with a perforator.
The required length of each piece of cable channel is best determined locally using a tape measure, or by directly applying the box to the wall where possible. In this case, the factory cut is better to immediately critically evaluate and, if necessary, "twist".
The horizontal position of the box during installation can be controlled using the building level. Vertical - using a plumb line. A building corner may also come in handy.
The lids of the mounted boxes are cut separately and at first simply fold neatly in a separate place.
A separate topic is joints when moving from vertical to horizontal. The main requirement here is that after closing the box with the lid there should be no holes or slots visible to the eye. Therefore, accessories here can be very helpful. But in case of its absence, one has to resort to various more laborious techniques.For example, performing an angular transition, you can cut both boxes at the junction at 45 degrees, and you can trim the inner walls of the boxes to their width by placing the boxes themselves “overlap”.
Of course, for an angular transition, the horizontal and vertical boxes must be the same size. To make “T-shaped” connections, the same size of the ducts no longer matters - in the wall of a large trunking duct, you can simply drill a hole sufficient for the outgoing cable.
The main thing when installing the box is not to rush and, in accordance with the well-known saying, cut it, only by measuring at least seven times. Haste and carelessness will not affect the quality of work in the best way.
Laying cables in a plastic box and closing the covers
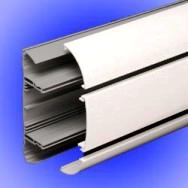 Putting the cable in the box is not so simple. In this regard, boxes with internal longitudinal partitions are convenient, helping the laid cable not to fall back before closing the lid.
The sequence when laying the cables in the cable channel is better to observe this: we lay the entire previously measured cable and immediately close the lid. If the box lock is of high quality, it will hold the entire cable and will not open under its weight. It is necessary to strive to ensure that the joints of the covers do not coincide in location with the joints of the boxes, then the entire line of the cable channel will look as a whole, and the joints will not be striking.
In the absence of accessories for cable channels, sizing and trimming of covers also becomes a responsible and important task. The problem areas are the same corner transitions and “T-shaped” joints, as well as the box places, which, in theory, should be equipped with plugs.
In particular, if there are no plugs, then the lid must be cut a little longer than the box and bent so that the end face remains closed. True, such tricks only go with a small cable channel, the lid of which is not too rigid.
Complete installation of cable channels
The wiring in the cable ducts is fully compliant with the interchangeability requirement. Therefore, someone who seals the box lid after installation, or seals the box with a sheet of drywall, does not do it right. However, it is quite possible to grease places of annoying misses and unsuccessful joints with sealant selected to match the color of the cable channel. The exclusion of junction boxes, switchboards and the connection of sockets, switches and lamps for electrical wiring in the boxes does not have any specific features.
Installation of wiring in plastic boxes - The task is complex and time-consuming. But with a competent and accurate approach, the result can exceed all expectations, both in terms of aesthetics and on the technical side.
Alexander Molokov
See also at bgv.electricianexp.com
:
