Categories: Electrician at home, Electric installation work
Number of views: 16563
Comments on the article: 1
Features of the assembly of modern electrical panels
Modern household electrical panels are significantly different from those that were in the last century. Particular changes were made in the assembly of the circuit and the breakdown of consumers into groups, as well as the introduction of protective devices such as RCDs or difavtomatov. The materials used have also changed. But first things first, in this article we will talk about the features of the assembly of modern electrical panels.
What is the difference between past and present apartment panels
Typically, a counter was installed in the apartments, plugs with fuses or automatic plugs and everything, then there was wiring in the rooms.
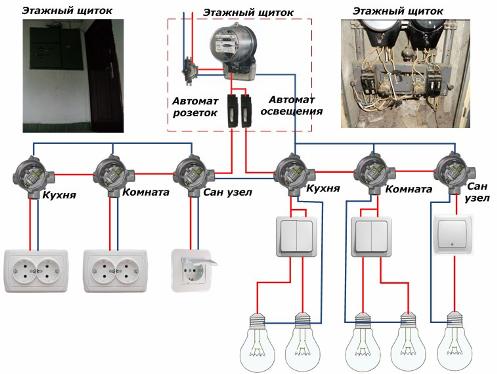
In the best case, a counter was installed with two pairs of traffic jams, then the load could be distributed among the rooms and the ability to disconnect each of them separately.
Now apartments have more powerful consumers of electricity and, at least, some circuit breakers installed on:
1. The outlet group of the entire apartment.
2. Lighting.
3. Water heating tank.
4. Electric stove.
5. The washing machine.
As a result, the approximate wiring diagram of a modern apartment is as follows:
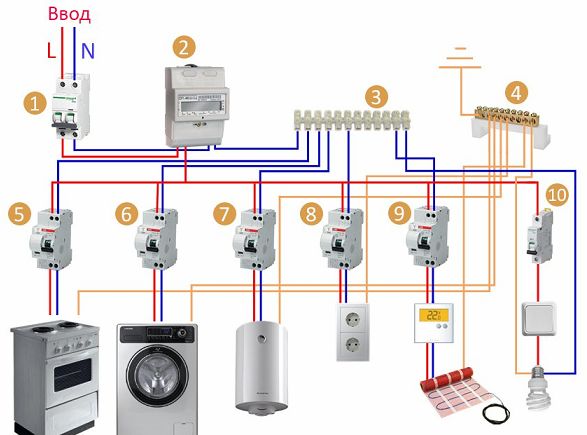
Terminal blocks, common grounding and zero tires, circuit breakers, RCDs with a trip current of about 30 mA - a total of 9 units, not counting the counter. Here the need arises to install an electric shield.
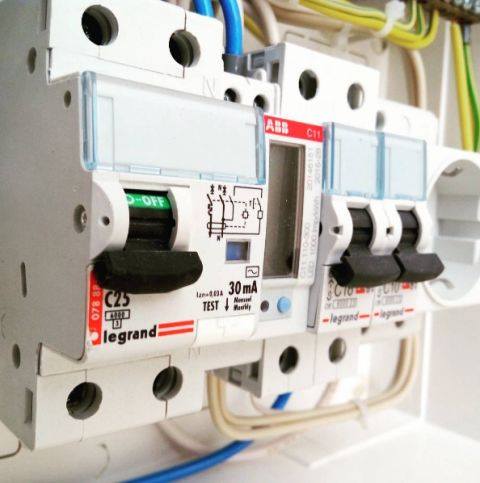
Types of Shields
Electrical panels differ in the type of installation:
1. External or overhead. Mounted on the wall, eat up the usable space of the room. They are convenient to use in utility rooms, garages, etc.
2. Internal or embedded. They are mounted in a niche, such panels are convenient to use in the corridors of apartments and in offices.
According to the material from which they are made:
1. Metal. Durable electrical panels, suitable for utility rooms, as well as in public places for anti-vandal purposes in order to prevent unauthorized persons from accessing the machines. They are usually locked with a key.
2. Plastic They usually look more attractive than metal ones and fit better into the interior.
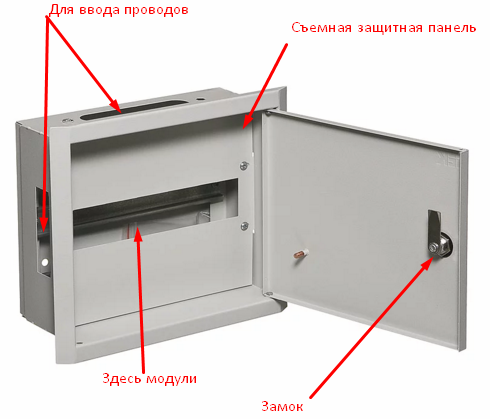
To reduce the likelihood of electric shock, all connections and wires are also covered by panels. Below is an example of a built-in metal shield for 12 modules with a din rail.
How to choose a shield?
The choice of a shield is based on free space and the ability to make a niche in the wall for an internal shield. Next, select a shield of a suitable size. To do this, you need a scheme for future wiring.
In modern panels all the equipment mounted on a DIN rail. Therefore, to select a shield of suitable sizes, you need to know how many modules will be installed in it (RCD, automatic machines, etc.). The empty spaces in the shield are closed with plugs, plastic or metal panels. In addition to the dimensions, they pay attention to the IPxx protection class if the shield will hang in a damp and dusty room.
More information about the types and shields and features of their choice, see here:
How to choose the right electric shield
Electrical panel assembly
To assemble the wiring diagram in the switchboard, use jumpers from the wire or comb busbars. The use of such tires increases the reliability, aesthetics and accuracy of installation.
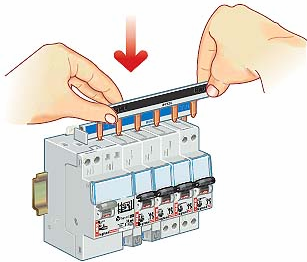
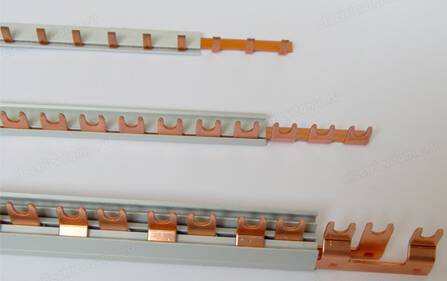
They are single or single-phase and with a large number of copper plates - two-pole and three-pole. Such tires are covered with a protective casing made of a material similar to plastic, which provides insulation and reduces the likelihood of electric shock and accidental short circuits.
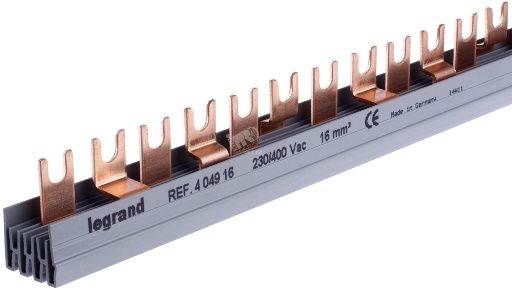
The adjacent busbars are bent so that all fit into one line, this is necessary to connect, for example, to a three-phase or two-pole circuit breaker. Contacts can be pin. Not every comb bus fits different modules.The problem arises with tires on which the contacts are fork-type - they may not fit into the terminals of the machines.
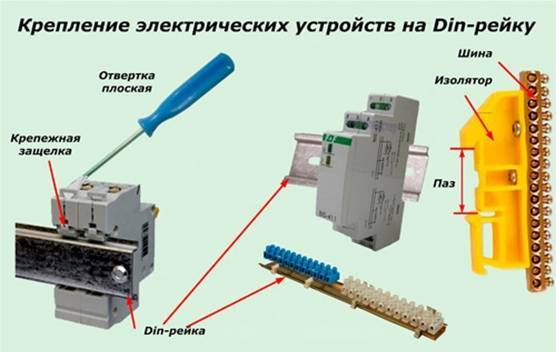
As already mentioned, almost all elements of the electrical panel are mounted on a din rail. This is a universal way of fixing equipment. It is made of perforated metal or a continuous strip curved into a U-shape.
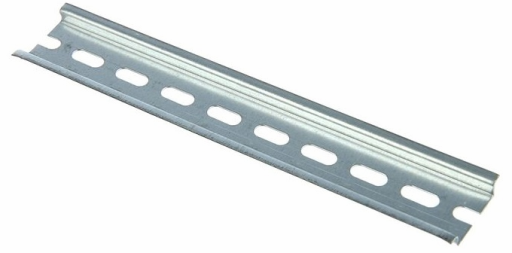
Such fastening allows you to conveniently replace machines and other elements of the control cabinet, and also speeds up assembly, because it eliminates the need to drill and tighten something.
The picture shows a method of attaching electrical equipment to a DIN rail, you just need to use a slotted screwdriver or another tool to pull the latch up and slide the module onto the rail. There is another option using latches, in the picture you see it on the common bus on the right.
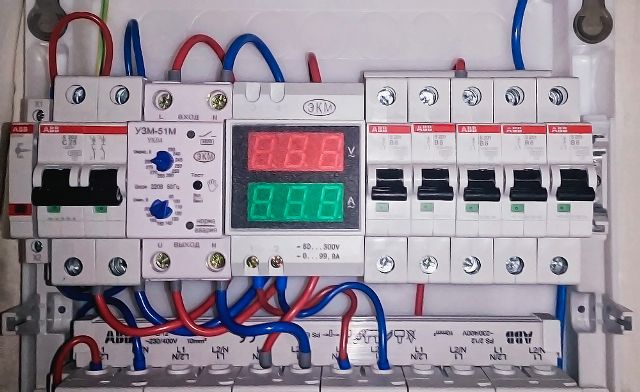
In the same way, not only automatic machines and RCDs are attached, but also other products, such as bus terminal blocks, sockets, timers, control modules ...
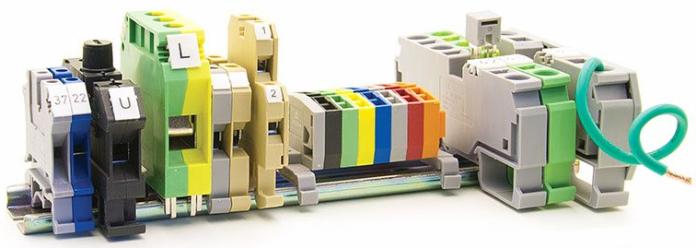
DIN rail mounting terminals
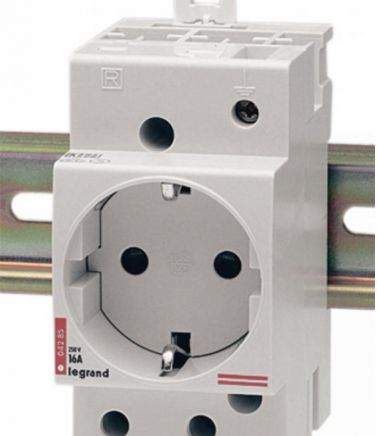
Socket for electrical panel:
For small installations
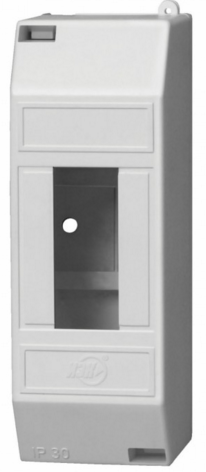
If you need to connect literally several machines, there is no need to buy a whole cabinet, there are special modular panels or boxes, they are designed for mounting a small number of modules from 1 to 4, there are more, but then the question arises of the advisability of installing them and you need to consider the installation option electrical panel. For example, for 6-8 modules.
They are of open type, the one shown in the picture contains 1 or 2 automatic machines, if you break out the plugs, its cost is very small - up to $ 0.5. Or with a lid, they look prettier and close automatic machines from prying prying eyes.
Key recommendations
To summarize, we list the main recommendations for assembling electrical panels:
1. Before purchasing equipment and a shield, make a wiring diagram at the facility. This will help you choose the right shield and equipment with the right characteristics.
2. Protect yourself from electric shock. To avoid electrical shock set difavtomaty or RCD with a trip current of 10-30 mA. This is recommended to be done at least for the main powerful consumers of electricity such as a boiler, electric stove and oven, by the way, we talked about how to connect them there recently in an article.
3. Do not break out more plugs than is necessary for modules to restrict access to buses or wires.
4. Flexible wires with multi-wire cores should be connected to automatic machines and other elements using terminals of the type NShVI. They can be crimped using special pliers or pliers. Otherwise, the contact will weaken, start to warm up, which can lead to failure of the machine, its false operation.
5. It is better to connect the supply wires to the automatic machine group with copper comb busbars. This will increase reliability.
6. It is periodically recommended to check the tightness of the screw terminals on the machines, at least 1 time in six months - a year after the installation of the electrical panel. Copper is a soft metal and the contact in the screw terminal may loosen, especially if it heats up. The contact must be excellent, all oxides must be removed from the conductors.
See also at bgv.electricianexp.com
:
