Categories: Electric installation work
Number of views: 5038
Comments on the article: 0
How to hang a chandelier on a stretch ceiling
When repairing an apartment, each stage requires a thoughtful approach - you need to decide how to make it not only beautiful, but also practical. The ceilings are finished in a variety of ways, from simple whitewashing or painting, to suspended ceilings made of drywall or stretch ceilings made of film or fabric. But you need to install lamps and chandeliers on it. If with plasterboard structures everything is more or less clear - it is rigid and you can attach the device to metal profiles, then with stretch ceilings the situation is different. In this article we will tell you how to choose and hang a chandelier on a suspended ceiling.
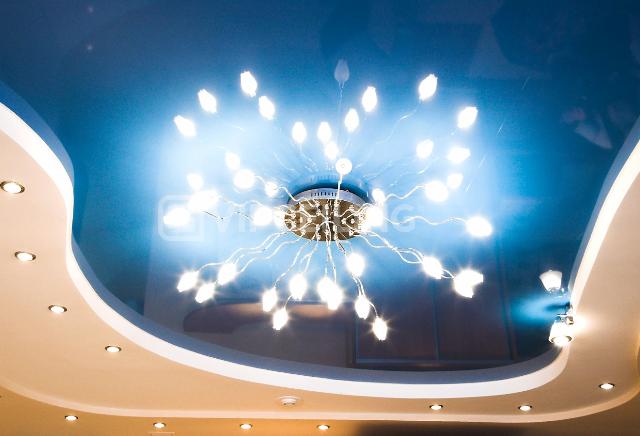
Features of the choice of fixtures for a stretch ceiling
A stretch ceiling is a canvas stretched at a distance from the ceiling. The distance is chosen by the customer and usually it is not less than 5 centimeters from the draft (main), for example, concrete ceiling.
Stretch webs come in two types:
-
PVC film
-
The cloth.
It follows that both materials cannot be overheated. This means that the main feature of a chandelier for a stretch ceiling is the lack of powerful heat sources. These include incandescent and halogen lamps.
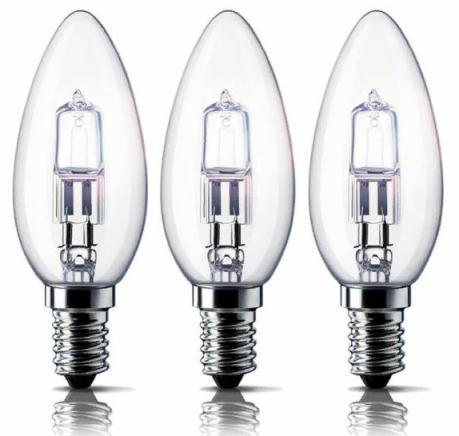
In general, of course, you can install these types of lamps in the chandeliers under a stretch ceiling, but at a distance of 30-40 centimeters or more from the ceiling, and the lamp power should not exceed 60 watts. When the PVC overheats, the coating melts and the fabric ceilings turn yellow, and then blacken. In addition, in order to reduce the heat flux that rises up, the ceiling lights of the chandelier should be directed down or to the sides, but in no case up.
That is, in this case, it is impossible to screw in a lamp in the style of an old chandelier with candles incandescent lamps. How to be Everything is very simple - now in the field of household lighting the leading positions are replacing LED lamp. They replaced energy-saving (compact fluorescent) LEDs for three reasons, LEDs:
-
does not contain mercury;
-
consume energy, with a similar light flux;
-
less warm.
You can not be afraid of burns and take on the included LED lamp or lamp.
It should also be noted that this type of ceiling decoration eats up the height of the room, so if you have it already low, do not buy large chandeliers, otherwise you will constantly hurt it with something. This is a trifle, but after installation it can bring a lot of inconvenience.
To summarize:
A chandelier with incandescent lamps for a stretch ceiling must be designed so that the plafonds are closed from above and directed down or to the sides of the ceiling. LED chandeliers or ordinary, but with LED lamps can have any design. At low ceilings, the chandelier should not hang down much, it is better if it is wide and extends along the plane.
Types of chandelier mounting
There are two main types of mounting the chandelier to a conventional ceiling:
-
On hooks;
-
On metal plates (traverses).
In the first case, the design of the chandelier provides a ring in order to hook onto the hook. In the second case, the chandelier is attached to the bearing part with studs, bolts or screws for a screwdriver.
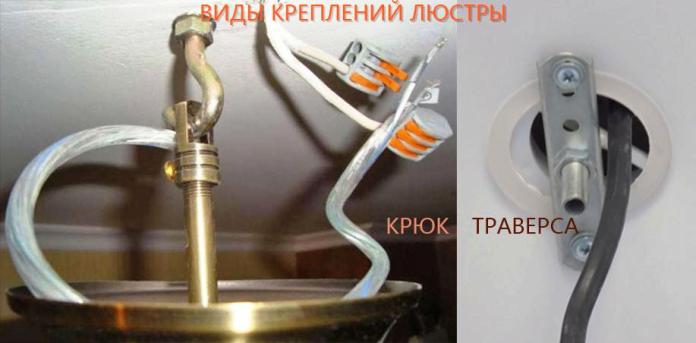
Anchor hooks are a stud with a thread and a hook at the end, a sleeve, nut and chamfer are installed on the stud. The sleeve is cut at one end. When you tighten the nut, it props the sleeve and presses it against the stop at the end of the stud. When the split part abuts the chamfer, the sleeve begins to open, its ends abut against the walls of the hole in the ceiling and are fixed.

If the lamp is not suspended and screwed to the studs on a metal traverse, then its design depends on the weight and dimensions of the lamp. They come in the form of a strip or in the form of a cross.
In the case of suspended ceilings, the mounting methods are similar, but there are some features. You can neither screw a self-tapping screw into it, nor drive a dowel or mount a hook. Firstly, it will tear, and secondly, although the coating is strong enough, you can’t hang anything on it so as not to stretch it or, again, not tear it. Let's take a closer look at this issue.
Features of the installation of luminaires on suspended ceilings
In simple words and briefly, all types of fixtures are still attached to the main ceiling, and through their stretched film, their lights or the entire lamp are simply displayed through the holes. But just cutting a hole in the film will not work (unless you certainly do not want to damage it). Therefore, all openings are framed by plastic thermowells, but let's talk about everything in order.
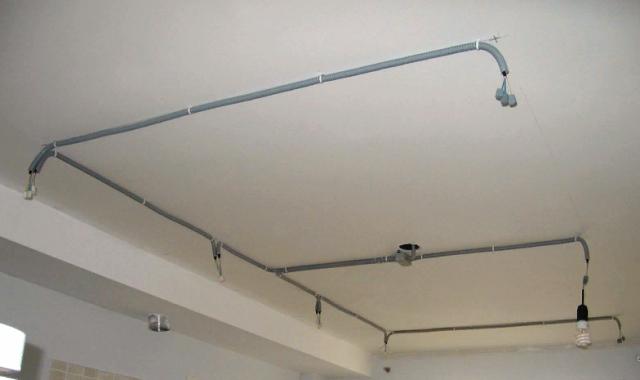
Installation of all fixtures begins before the installation of a stretch ceiling, and ends later. First, on the main ceiling mark the installation location of each lamp, chandelier. After that, wires are laid from the junction boxes to the installation points of the fixtures.
Attention:
Wires on the main ceiling in corrugated pipes, corrugation is fixed with clips or dowels with clamps. Please note that the line must be solid, because if you connect it from several pieces, and then the contact disappears in them, it will not work to service this connection without dismantling the film. If the connection cannot be avoided, use sleeves, welding or soldering.
Further, depending on how you will attach the chandelier, install a hook, attach a mortgage or wooden beam instead.
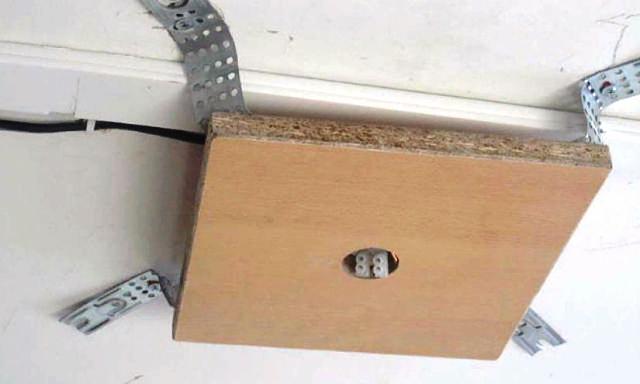
A mortgage is a bearing part, it consists of a plastic ring (for spotlights), a plywood or wood platform (for a chandelier), which are attached to the main ceiling with metal legs or corners.
At the same time, in the mortgages that they do with their own hands in the center, they make a hole in order to output the wires, and if the lamp is powered by a driver, the hole should provide for its removal and be of the appropriate diameter. In factory-made mortgages - this is provided for by the design.
The metal legs are bent so that the mortgage is a little closer to the main ceiling than the stretch coating.
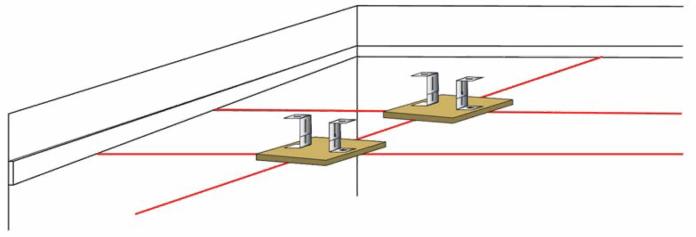
If you are not going to lower the main ceiling too much, but only a short distance of about 5 centimeters, instead of a mortgage, you can screw a wooden bar or a sandwich from plywood sheets to the ceiling.
If the chandelier is hung on a hook, the hook is screwed in at the place of attachment so that it protrudes from the ceiling at a distance slightly less than that by which the main cover is lowered.
After that, a stretch ceiling is installed and a mortgage or hook is found through the web, gently pushing the web through.
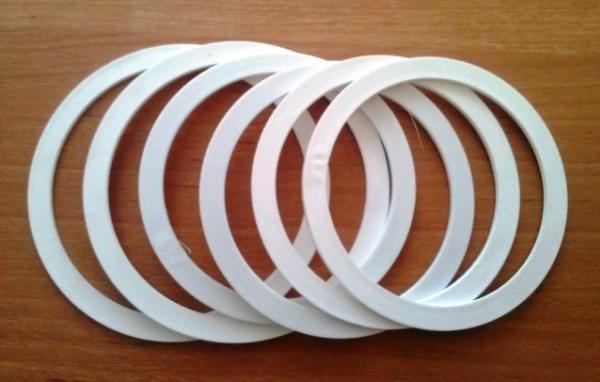
In the case of suspension of the chandelier on the hook in the place where it is located, stick the thermal ring. The rings come in different sizes according to the diameter of the future hole. After the ring is glued, it is necessary to carefully cut a hole along its INTERNAL radius.
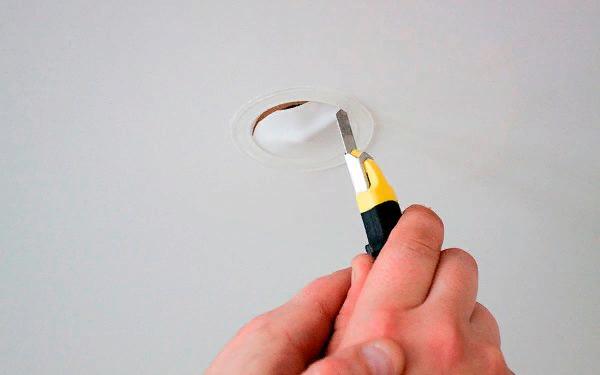
This can be done with a scalpel, clerical knife or blade - in general, with any cutting object with a thin and sharp blade. Next, you will have access to the hook and you will be able to display pre-prepared wiring for the chandelier.
The wires are led out of the chandelier, suspended on a hook, and then the wires are connected. If everything works properly - the wiring can be hidden.
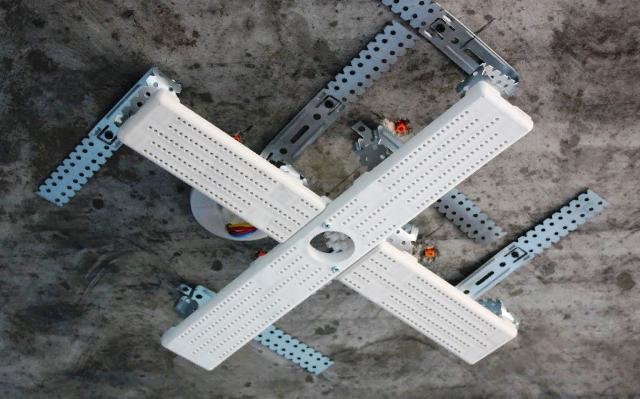
If you fix the chandelier to the mortgage, then find its edges and mark the places for installation of the fixture. Fixtures in this case are either in the form of a straight strip with studs, and if the chandelier is heavy and large, in the form of a cross. If the mount is long, then it is mounted not only in the center, but also along the edges, the same applies to cross-shaped mounts.
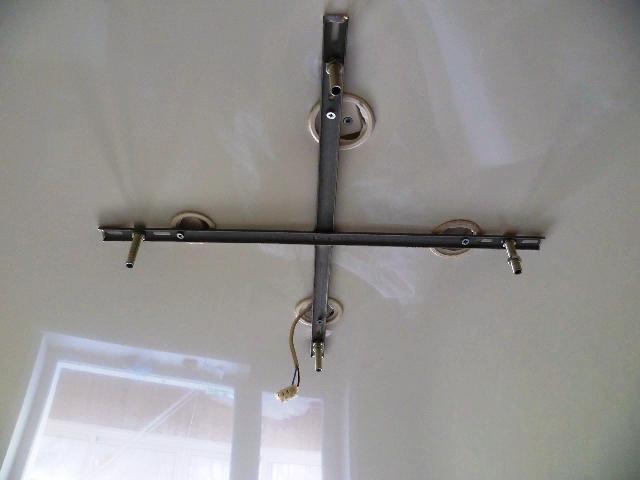
In this case, as many rings are glued in the PVC film as many attachment points are provided by the structure, and the mortgage is set to the appropriate size.For example, for a large mount in the form of a cross, you need to stick 5 thermal rings and make 5 holes respectively. 1 in the center for the output of wires and 4 in order to screw the mount.
Conclusion
Actually on this the process of installing the chandelier on the suspended ceiling ends. As you can see, it is not much different from fastening to an ordinary ceiling and concrete or wood floors. The most responsible in this process is the stage of wiring and the correct finding of all mortgages under the stretched canvas. Otherwise, if you work carefully, you will not damage the film in any way.
See also at i.electricianexp.com
:
