Categories: Electric installation work
Number of views: 96592
Comments on the article: 0
Sizes of sockets: diameter, depth, center distance
An installation box for a hidden installation, designed to mount an outlet in it, is called a socket box. Most often, the undergrowth has a round shape (less often square) and a standard size. The main function of the socket is to provide a rigid and reliable mounting place for the outlet inside the wall, near the plane of its surface.
If you needed to install a socket, then armed with quite ordinary tools (pencil, level, putty knife, brush, hammer, chisel, drill with a crown, alabaster), you can do it yourself. Follow safety precautions, first turn off the power supply in the shield, carefully use the tool, remember the standards - and everything will work out.
Mounting a socket
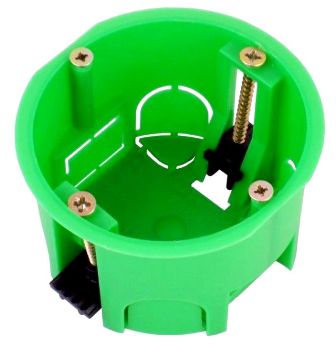
First make markup relative to the wire going to a future outlet. Draw a horizontal line at a small distance from the wire - this is the level of the center of the future outlet, then draw a vertical line - this will be the edge of the socket (the wire will have to go from above from the side), finally put the socket inside and circle it with a pencil - mark the place for drilling.
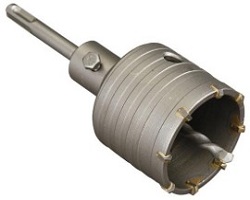
Standard diameter for drilling crown - 68 mm, with a depth of approximately 45 mm, this should be considered when choosing a crown. In general, the nozzle on the drill is called the “crown for the socket” (they are for concrete, for wood, etc.), so there will be no problem with its acquisition. Drill according to the marking, if necessary, during the drilling process, the nozzle is moistened with water so that it does not overheat much.
The socket is tried on to the hole, the remains of the drilled material are removed with a chisel and hammer.
If the socket is placed single, then the transitional ears from its edges are cut off so that they do not interfere with installation in the landing hole, but if the sockets are somewhat close (socket block), then the necessary ears are left to fasten several socket to each other.
If the undergrowth easily enters the landing hole - all is well. The wire should easily enter the diagonal hole of the socket, which is located on the side near its rear wall.
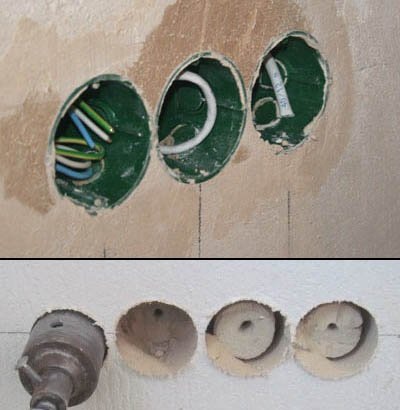
When the undergrowth normally enters, it is suitable in diameter and depth, the hole is moistened with water to better stick alabaster, then the solution is kneaded. The solution is prepared at the rate of 4 to 1 to 4 parts of alabaster to 1 part of water. Apply the solution to the fungus from all sides in contact with the wall.
They carry out the installation, put the undergrowth strictly in the plane of the wall, so that it does not protrude and does not fall too deep, the edges of the undergrowth should be at the same distance from the edges of the landing hole. The remains of the alabaster solution mask the wire going to the undergrowth.
Drilling walls under the sockets on the video:
Installing a new outlet in an old socket
Sometimes, when carrying out repairs in perennial houses, it turns out that the old metal socket is much wider than necessary, the new socket in it hangs like a bucket, the paws do not catch. In this case, you can put a new socket on the inside of the old box.
A tough, wide old box without a bottom will require the use of alabaster solution, as is the case with the installation of a wall socket. If the box firmly holds the new socket, then it is simply screwed on to the old screws, remembering that the wire must be wound on the back side, and not damage it with screws.
A block of several sockets
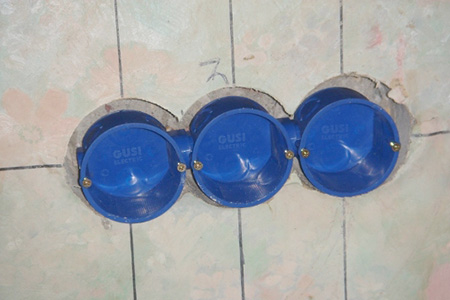
If the sockets are placed somewhat in a row, then this is done by mounting the block of sockets.The crown is taken with a slightly larger diameter - more than 68 mm, up to 80 mm - the mounting holes will be combined with each other, and the center distance will be at least 71 mm.
They make horizontal markings relative to the wire, which will have to go to the right, then mark the wall for drilling the landing holes, taking into account the desired interaxal distance or along the already connected socket boxes - they simply circle the block.
Drill holes, remove the excess with a chisel and a hammer, remove the partitions, start the wire horizontally. The stock in diameter will help to evenly orient the block. Transitional ears perform their function here - they combine the rosettes into a block.
Installing a socket box in drywall
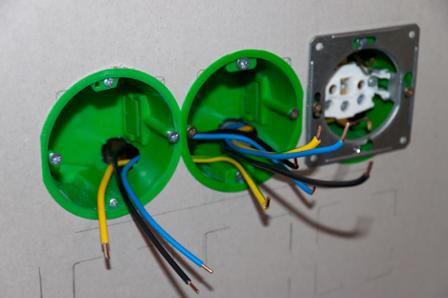
Universal drywall sockets for plasterboard have special spacer ears that facilitate fixation, and do not need alabaster with them. A hole is drilled with a crown for the size of the socket, installation is carried out, fixing is carried out with a screwdriver - that's all. The fastening ears, when twisted with a screwdriver, burst and hold well inside thin-walled surfaces such as drywall.
The universal socket has a distance between the locking tabs of about 83 mm, so if the switch or socket differs by more than the distance between ordinary fasteners, such devices will fit well. Also, universal socket boxes can, in principle, be screwed to a tree or put into concrete, simply by removing the locking tabs.
Installation under plaster or tile
If the wall will be plastered or tiled in the future, then this must be taken into account when installing the socket. Make a margin of about 7 mm on the ledge (or how much will be the coating) so that the plane of the future wall covering coincides with the edge of the installed socket. Thus, the undergrowth must be left standing.
In general, when installing a socket in a wall in advance, it is important to take into account the fact that the depth of the future outlet (switch) and its diameter will probably differ from the geometric parameters of the socket.
The wire in the socket should have a margin
Despite the apparent insignificance of this aspect, the prudent installer always takes into account the fact that it is likely in the future, when replacing the outlet or switch, it will be necessary to strip the wire or slightly shorten it. If the wire turns out to be short, then it will have to be increased, and this will be associated with increased vulnerability of the compound, it will oxidize faster and collapse, will spark.
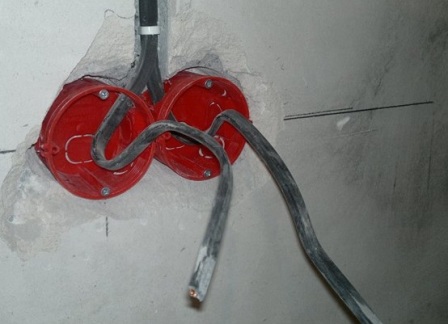
The wire is taken with a margin of about 20 centimeters, gently twists into a spiral or bends smoothly (not cool), and thus compactly fits inside the socket. This is done, of course, so that if in the future the owners start a renovation of the interior, they can easily update the sockets without unnecessary troubles and problems with building up. How to build up a short wire if the wall, say, is covered with tiles or plaster? It’s easier to leave stock in advance.
See also on this topic: Features of mounting sockets and switches on various surfaces
See also at bgv.electricianexp.com
:
