Categories: Electric installation work
Number of views: 8895
Comments on the article: 0
The use of electrical skirting boards - purpose, types, advantages, installation
Having started a major overhaul in an apartment or office, we somehow ask ourselves questions about how to better mask the wiring, how and where to lay various cables (power, acoustic, television, telephone, Internet cables, etc.).
There are many ways hidden cable management: inside the strobes in the wall, in the corrugated tube along the edge of the ceiling or floor, you can finally just leave different wires lying near the baseboard along the wall. Each of these methods differs in its features, but often there are more minuses than pluses.
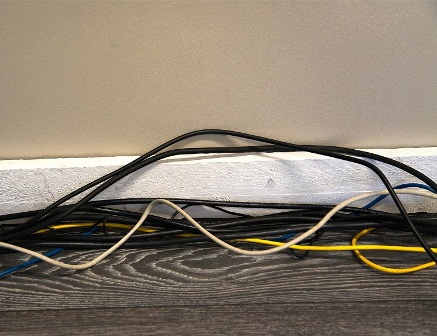
If you consider standard solutions such as stroba or corrugated pipethen the cons are obvious. Installation of wiring inside the wall is associated with high laboriousness, you need to hollow the grooves in the walls, and if later you need to replace the wires for some reason, then until you get to them - you will finish the entire finish and then you will need to restore it, and there will be a lot of garbage.
Examples of using hidden wiring in rooms:
Electrical wiring in the apartment
How to make installation of hidden wiring
Wiring in the house of SIP panels
There is another option, more modern - to use as a casing for electrical wiring special electrical skirting board.
An electrotechnical baseboard is two in one at once. Firstly, the electrotechnical baseboard is a casing for concealed wiring, and secondly, an integral element of any modern interior.
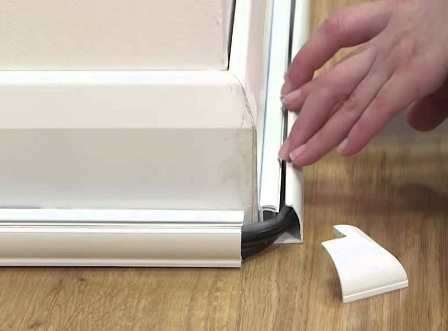
Thus, applying an electrotechnical baseboard, a person will solve the problem of flush mounting easily and quickly, without unnecessary debris and with minimal labor. In addition, it will immediately provide an aesthetic aspect regarding interior design. The wiring will be laid along the wall safely and imperceptibly, but in appearance you can’t even say that this is some kind of unusual baseboard.
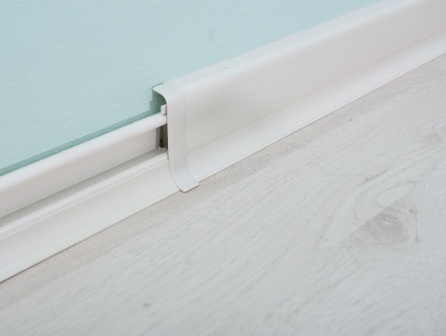
Structurally, the electrotechnical baseboard is a detachable product made of sufficiently strong and flexible PVC, chemically inert and not fragile. The electrotechnical baseboard consists of only two main parts - from the mounting plate and the outer protective panel.
The mounting plate with its flat rear part is attached to the wall, and on the outside of the strip for mounting wires there are protrusions in the form of shelves or niches - a kind of cable channels, which can be one or more, depending on the model of the plinth.
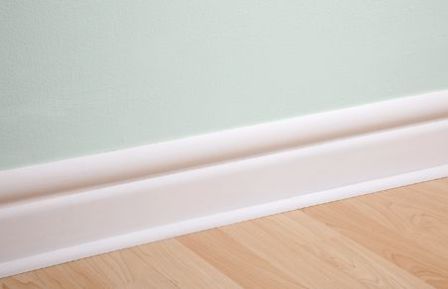
After completing the installation of the wiring (after laying the wires in the strip), an external protective panel is fixed on the mounting plate, which is mounted on top with special clamping tabs without any auxiliary fasteners. That is, the connection remains detachable. The outer cover plate is more flexible, easy to install, and if necessary later easy to remove if maintenance is required.
Protective panels are of two types: in the form of a narrow strip in the center of the baseboard or completely covering the mounting strip in width. Aesthetically, the entire product assembly looks like an ordinary plinth, and the colors are very different: wood, stone, plastic, etc.
Advantages of electrical skirting board
The advantages of using an electrical plinth in an apartment can hardly be overestimated. Installation is carried out without violating the integrity of the walls and decoration, in addition, it is possible to disguise long wires from household appliances and various cables that are undesirable to wall tightly.
If you need to add another cable to the wiring or to prevent wiring, you can simply open the baseboard as a box with a lid, and perform the necessary manipulations, and then close the structure without resorting to using complex tools.

Today on the market are electrotechnical skirting boards of various models. These are skirting boards for one conductor, and for multi-wire installation, and with separate shelves for power and data cables, so that some wires do not cause noticeable electromagnetic interference to others: a network cable away from a telephone cable, a telephone cable away from a television cable, etc. Externally, a skirting board can be matched to the design of the room, a suitable color and a more pleasant-looking form.
The disadvantages of cheap models
Of course, some models of electrotechnical baseboards have disadvantages. For example, a cheap skirting board may turn out to be brittle and crack during installation, and the edge of the mounting strip will lose its elasticity over time and move away from the floor - a gap will form into which debris will fill. This is a consequence of the insufficient amount of plasticizer in cheap PVC material. The latches can be fragile and burst when you try to open the top panel.
Cheap PVC is very sensitive to ultraviolet, and the white skirting board will turn yellow after prolonged exposure to sunlight, and the color texture of the cheap skirting board will quickly fade. Do not save when choosing an electrical plinth if you want to get a quality product for many years!
Installation of electrical skirting board
When installing an electrical plinth with your own hands, the stage of preparation for work is very important. Determine where it is necessary to lay the wires, measure the total cable length, including the leads to consumers, determine the number of cables in the channels and the number of channels needed in the baseboard, as well as the size of the channels so that the cables fit into them. Based on the measurements and calculations, get ready to purchase skirting boards of the desired configuration and required length.
For vertical leads, individual channels with adapters connecting these channels to the baseboard will be required. Count the right number of vertical channels and adapters for them.
The baseboard itself will also require adapters for decoration on even sections of the walls, and plugs for corners and ends, outer and inner corner pads and left and right end caps. Count the required number of them.
If you decide to install sockets or push-button switches directly on the baseboard, there are such options; it will be enough to buy special mounting boxes for installing sockets or switches directly on the baseboard. These are plastic products with mounting holes inside for connecting wires from the baseboard to the wires located on them wiring accessories.
When all the parts for installation (including plastic dowels and screws) are purchased, it is time to take care of the tools. Here you will need an elementary set: a drill (puncher), an awl, a screwdriver (screwdriver), a hammer, a hacksaw for PVC (a hand saw or circular saw) and the construction level.
When conducting electrical work, it is important not to forget about safety:Instrument Safety
First, they free up space along the wall: they remove furniture, appliances, carpets, and eliminate everything that might somehow interfere with work. Dismantle the old baseboard, remove the dust so that the floor remains clean, so that the dust does not clog under the new baseboard. After that, they begin to work with the mounting plate. To do this, completely remove the protective panel from the baseboard box, and begin installing the bar.
The fastening begins from one of the inner corners, put on one end of the strip an angular adapter, and apply it to the wall.In those places where it will be necessary to mount with screws, with the help of an awl, pierce holes through the bar through the awl, leaving an awl on the wall with a mark.
After the marks on the wall are applied and the holes in the bar are ready, proceed to drilling holes in the wall. The marks drill holes for installing dowels with the appropriate drill using a drill or punch. Plastic dowels are driven into the holes, then the mounting bracket is put in place, and screwed with self-tapping screws. If the cable channel is open, then for each self-tapping screw it will be necessary to attach an individual clamp.
So the baseboard is laid around the perimeter, in the places of transitions and at the corners, longitudinal and corner adapters are installed. The baseboard is cut to size, with a margin of 5 mm for the adapters, using a hacksaw or saw for PVC.
Next, on the shelves inside the baseboard, on the mounting plate, lay the wiring. If necessary, make additional fixation of wires with special fasteners. In those places on the baseboard where the rosettes will be, they make holes, clean their edges with a file so that the insulation of the wires is not accidentally damaged.
They install podrozetniki, fasten them in accordance with the instructions. The wires with stripped ends are inserted into the socket, then the sockets are assembled. After installing all the elements in place, they complete the installation by closing the baseboard with protective panels that simply snap on top.
So, if you install an electrotechnical baseboard with your own hands, in compliance with the installation sequence, timely removing excess debris from under the mounting elements, then your wiring will be reliably protected for many years from mechanical damage, from moisture and dust. And you and your loved ones, including pets, will be safe thanks to the new multi-functional interior element.
See also: Layout of wiring in an apartment and a private house
See also at bgv.electricianexp.com
:
